Project verification integration
Mark the verification status of project Countermeasures using weakness and vulnerability information from the output of verification tools. With this information, project teams can identify which requirements need further testing by other tools or manually by a testing team. SD Elements projects can integrate with verification tools in two ways:
-
File upload: Upload a scanning report file containing vulnerability and weakness details from a supported tool.
-
Remote download: Configure a connection to import scan results from a supported tool on a regular basis.
Import results from a scanning report
Import scanning results from a verification tool by following the steps below.
-
Report file from a supported verification tool.
-
Project setting Project Settings→Development/Test Tools→Development Tools→Uses static or dynamic security code analysis is set in the project survey.
-
The user satisfies either of the two following requirements:
-
The user is a member of the project and has the following permissions:
-
Project Roles→Countermeasures→Verify Countermeasures
-
Project Roles→Countermeasures→Write notes on Countermeasures
-
Project Roles→Countermeasures→Change Countermeasure status
-
-
OR The user is a member of the project’s business unit and has the permission Global Roles→Administration→Edit all projects.
-
-
Select a project, then select Integration.
-
Select the Verification tab.
-
Click the plus button on the right.
-
Select one of the file upload systems from the system dropdown.
-
Click Choose File and select the scan report file.
-
Enter the required information:
-
Behavior: See Support for multiple verification tools for more information about this option.
-
When verification status is…: See Working with verification tool results for more information about this option.
-
-
Click Create.
Integration is initiated immediately with the weakness information from the selected file. After completion, any applicable project Countermeasures are updated with a new verification status. Project Countermeasures without an update must be verified manually or possibly with a different tool. A file upload connection is visible from the verification connection list page. Click on the connection to see the full set of file upload syncs done for a particilar system and project.
Add/Edit a project verification connection
Create or update an existing project verification connection by following the steps below.
-
The user must satisfy the following in addition to one of three other requirements:
-
The user is a member of the project.
-
Project setting Project Settings→Development/Test Tools→Development Tools→Uses static or dynamic security code analysis is set in the project survey.
-
-
At least one of the following requirements:
-
The user is a member of the project and has the permission Global Roles→Integration→Edit Verification connections.
-
The user is a member of the project’s business unit and has the permission Global Roles→Administration→Edit all projects.
-
The user is a member of the project and has the permission Project Roles→Countermeasures→Verify Countermeasures.
-
-
Select a project, then select Integration.
-
Select the Verification tab.
-
Click the plus button on the right.
-
Select one of the remote connection systems from the system dropdown.
-
Only systems that have a global connector created will appear in this list.
-
If there is no remote connection system listed for the system you’d like to sync with, please contact your administrator to create a global connector for that tool.
-
-
Enter the required information:
-
Parent: Select the system integration connection for the verification tool.
-
Connection Name: Enter a name for the connection.
-
Behaviour: See Support for multiple verification tools for more information about this option.
-
When verification status is…: See Working with verification tool results for more information about this option.
-
Additional configuration fields appear.
-
Refer to the verification tool’s configuration guidance for more details.
-
It is important that you enter the correct values for these fields instead of using the default values to ensure the integration is successful.
-
-
-
Click Create.
The connection is ready to import scan results from the remote tool.
| Initiate a manual import of the connection to validate its configuration. |
Delete a project verification connection
To delete a project verification connection follow the steps below.
-
The user has permission Project Roles→Countermeasures→Verify Countermeasures.
-
Open the project Countermeasure list page.
-
Select Integration.
-
Select the Verification tab.
-
Search for the connection from the list.
-
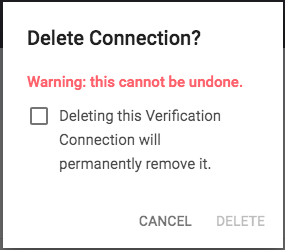
Hover your mouse over the row on the far right and select the trashcan icon. A dialog will appear.

-
Acknowledge the warning.
-
Click Delete.
The connection is removed from the project and no future import operations will occur. The verification details imported previously are not affected by this deletion.
Import scanning results from a connection
Users can import results from a verification tool after creating a project connection to the verification tool. Follow the steps below to import the vulnerability and weakness data into the SD Elements project.
-
The user has the permission Project Roles→Countermeasures→Verify Countermeasures
-
Open the project’s list of Verification connections.
-
Search for the desired connection from the list.
-
Click the connection’s Import
 button.
The import process is initiated. It may take a few minutes or more, depending on the size of the verification tool’s report and the latency between SD Elements and the other server.
During import the integration will update applicable project Countermeasures with a new verification status depending on the report’s weakness/vulnerability information.
Project connection status
A project’s verification integrations page shows the synchronization status of each connection. The status of an integration will be shown in the "Last Imported" column, having one of four values:
-
Not Run: The integration has not yet run.
-
Working: The integration is underway.
-
Failed: An error occurred during synchronization.
-
Hover over the "Failed" status to view further details.
-
Check that the user has sufficient permission and any required fields are set for a new Issue Tracker issue.
-
-
Success: The integration was successful, check the project Countermeasures for an updated verification status.
