
Project tasks
A project’s security requirements and tasks are displayed on the Project Tasks page. Users can drill into each task to learn more and action them.
Types
There are two types of tasks that can be present in a project:
-
Library tasks:
-
These tasks are normally included based on the project survey, but can also be manually added to a project.
-
-
Project specific tasks:
-
These tasks have limited details and can be manually added to a project.
-
Organization
Every individual task is associated with a phase of the Software Development Life Cycle (SDLC). In this view, tabs represent phases.
By default, users begin with the Requirements tab and navigate to other phases by clicking on the appropriate tab. The four default phases are:
-
Requirements
-
Architecture & Design
-
Development
-
Testing
Refer to Default phases for more information about the default task phases.
List
During the life of a project, the list of tasks can change as tasks are added or removed. Some task list changes are immediate, and other changes require confirmation depending on what triggers the change.
-
A project specific task is added: A project member adds a new project specific task.
-
A project specific task is removed: A project member removes a project specific task.
-
A library task is added: A project member manually adds a library task.
-
A library task is removed: A project member manually removes a library task.
-
Change of project settings: A project member saves the project survey with a new set of answers.
-
Content rules update: The rules governing when problems and tasks are relevant to a project are changed. These rules can be updated by the content administrator or when a new version of SD Elements is released. Please refer to Project content updates for more information.
|
|
If a project is configured for ALM integration the list of tasks are reflected in the other system when the sync runs next. |
Basic task detail
For each task, the project task list displays the following information:
| Attribute | Description | Note |
|---|---|---|
Status |
Indicates whether the task is "TODO" (the task is incomplete), "Done" (the task is complete), or "Not Applicable" (the task does not apply to this project). |
|
Priority |
Score that indicates how important the task is relative to other tasks. 10 is the highest and 1 is the lowest. |
Use the Priority to help select which tasks to carry out if you do not have enough time to do all of them. Agile teams can use the priority field to help enter SD Elements task appropriately into the backlog. |
Title |
The title of the task. The number, such as "T133", is the unique number of the Task in SD Elements. |
|
Verification |
The verification "ribbon" on the right side of the task indicates its verification status: pass, partial pass, or fail, as discussed below. Clicking the ribbon will open up a small verification "widget", where the user can manually set the verification status of a task. See Expanded task detail for more information. |
A comment from a project team member about the task. For example, where to find audit evidence that the task has been completed. You can add and edit the note.
|
Basic task view:

Expanded task detail
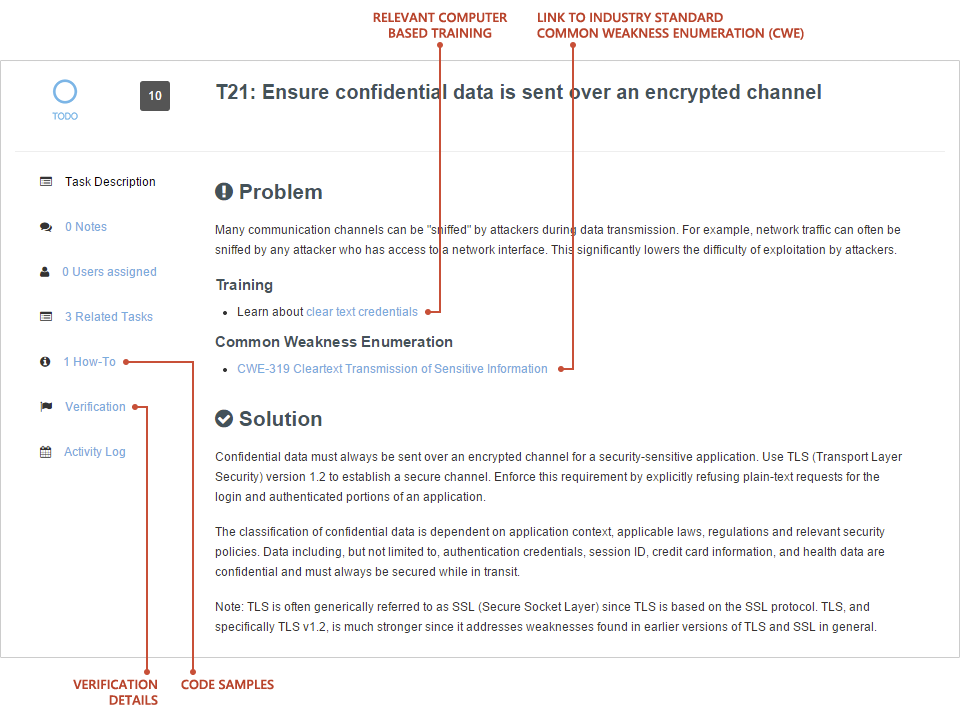
When a user selects a task, the following information is provided:
-
Solution: The best practice or guidance to address the associated problem.
-
Problem: The risk or reason the task needs to be completed.
-
Related Tasks: Tasks in the system common to the same underlying Problem.
-
How-Tos: Code samples or detailed instructions on how to achieve the desired solution with a specific technology. For example, how to perform input validation with the Java Struts framework.
-
Verification: The verification status of a task, as indicated by an automated scanning solution or manual verification. The verification section provides assurance that a task has actually been completed.
A verification tool, such as static or dynamic scanner, leaves a note in the system with the following fields:
-
Status: Fail, pass or partial pass
-
Date Tested: When the test results were imported
-
Report Reference: Where in the report to find more details
-
Findings: Number of findings identified and the exact reference, in the case of a Fail status
-
Project specific task details
A project specific task is a normal task but with the following distinctions:
-
Only applicable to a specific project/release.
-
Unlike normal tasks, a project-specific task does not have related rules, how-to’s or underlying problems.
-
The identifier of a project-specific task begins with "PT". A normal task is prepended with "T".
Add a project specific task
To add a new project specific task follow the steps below.
-
The user has the permission Project role→Project Management→Add Project Task.
-
Browse to the Task section of the Project.
-
Click Add Task on the top right of the page.

-
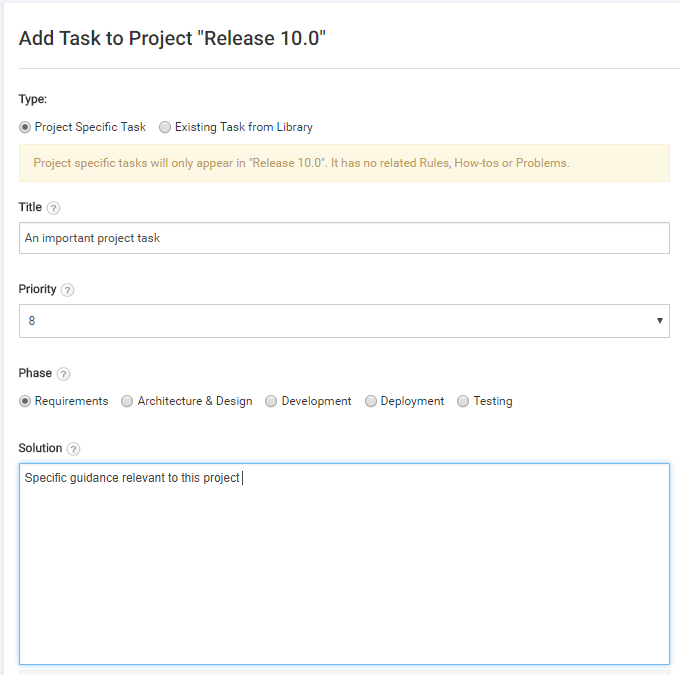
Select option Project Specific Task.
-
Enter the required information to the fields provided.
-
Click Save.
The new task is added to the project.
Modify a project specific task
To change the details of a project specific task follow the steps below.
-
The user has the permission Project role→Project Management→Add Project Task.
-
Browse to the Task section of the Project.
-
Select the project task from the list of tasks.
-
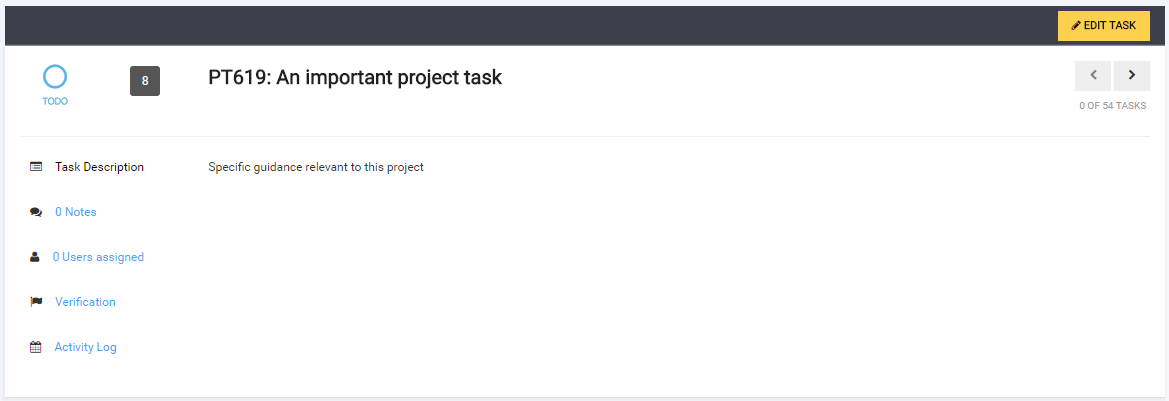
Click the Edit Task button on the top right of the page.
-
Update the details.
-
Click Update.
The task’s details are updated in the project.
Delete a project specific task
To remove a project specific task from the project, follow the steps below.
-
The user has the permission Project role→Project Management→Add Project Task.
-
Browse to the Task section of the Project.
-
Select the project task from the list of tasks,
-
Click the Edit Task button found on the top right of the page.
-
Click the Delete Task button found on the top right of the page.
The task is removed from the project.
Add a library task to the project
Use the following steps to add a library task to your project.
-
The user has the permission Project role→Project Management→Add Project Task.
-
The task is not already in the project or will be in the project once content updates are accepted.
-
Go to the project tasks page.
-
Click on the Add Task button to bring up the task creation form.

-
Select option Existing Task From Library. A form with a field for choosing a non-applicable Library Task is displayed.
-
Select a Library Task. The form is autopopulated with its solution, priority, and phase field data. These fields are read-only.
-
Click Save.
The task is added to the project. Its How-To and other rule-based content appear in the project according to the project survey.
Remove a library task from a project
Use the following steps to remove a library task from your project.
-
The user has the permission Project role→Project Management→Add Project Task.
-
The task is not applicable to the project based on its survey selections.
-
Go to the project tasks page.
-
Select the task.
-
Click Remove Manually Added Library Task in the top-right corner of the project task detail view. If the delete button is not visible the task is bound to the project survey.
The task is removed from the project. All changes made to the task are permanently deleted.
Filter project tasks
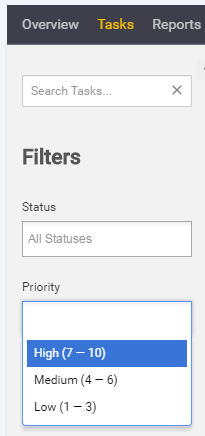
The project filter can be used to search for tasks matching certain criteria. It is also useful to help prioritize which tasks to focus on:
-
"For this release only focus on High priority tasks"
-
"Find all tasks that failed verification"
-
"Show me which tasks that should be assigned to manual testers"
-
The user has the permission Project role→Project Management→View project.
-
Browse to the Task section of the Project.
-
Click on the magnifying glass on the left side of the page.
-
Use one or more of the options to filter the tasks.
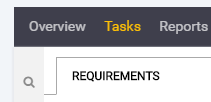
Use the filter to search for tasks in the Search Tasks field. Keyword search filters the list of tasks in the currently selected phase by keyword. Filtering tasks by status, priority, assigned user, category, verification or tags is also supported.
|
|
It may take up to 1 hour for the search indexing system to register updates to custom content or task changes in the project. |
Take in-context training
To take integrated training, follow the steps below.
-
Advanced training integration is enabled.
-
The user is a member of the project.
-
Browse to the Task section of the Project.
-
Scroll to a project task from the list with training.
-
Click the training school link.

-
Click the training module to launch training.
The training starts immediately. A training module is considered "completed" when its quiz is completed with a passing grade. Training can be abandoned and taken again later. Users can also retake a training module in the Track training progress area of their Account profile.
