
Tasks
In this section:
- Task details
- Additional Requirements details
- How-To details
- Add a custom task
- Update a custom task
- Update a default task
- Deactivate a task
- Reactivate a task
- Delete a custom task
- Delete Additional Requirements or How-To’s
- Restore all Additional Requirements or How-To’s
- Revert all task customizations
- Revert specific task customizations
- Apply a task tag
- Search for a task
- View a task in read-only mode
A task is an individual unit of work. It represents a prescriptive step to prevent a problem (a potential security weakness or business issue), or a method to test whether a problem exists. Each task has a status representing whether or not it is complete, a priority, and other properties.
|
|
Library tasks are automatically assigned to projects based on how their rules match project survey answers. Library tasks can also be manually added to projects. |
The application tracks an official set of tasks and their rules for when they are applicable to a project. A Default task can be modified and additional tasks can be added as well.
Task details
-
Title: The title of the task as it will appear in the Project.
-
Priority: The priority of the task will appear in the tasks page.
-
Phase: The phase in which the task will appear.
-
Problem: The problem that the task is trying to solve.
-
A task is assigned to problem "Always Applicable" if there is no associated problem.
-
The problem’s rules appear on the right side of the page. They must apply to a project before the task’s rules are evaluated.
-
-
Solution: A general approach to how to solve the problem. This is the main detailed part of the task. Solutions are concise and link to other sources for more details.
Use Markdown to apply rich text formatting to a Solution. Markdown syntax is accessible by clicking on the box beneath the Solution. -
Rules: The section titled Applicable to a Project when the following rules are met shows the rules for the task. There are two types of rules that appear here:
-
Problem’s Rules: If you selected a problem other than "Always Applicable" then that problem’s rules will appear first, followed by a single "AND" clause for the Solution’s Rules. If you selected "Always Applicable" as the problem, then this section will not appear.
-
Task’s Rules: These are the rules for when the task should appear in a project. If you selected "Always Applicable" as the problem, then these are the only rules. If you do not enter any rules, then this task will appear in all projects.
-
-
Additional Requirements: Additional steps or controls relevant to a task in certain conditions. Additional Requirements provide clearer guidance to address the underlying problem in the context of an industry standard or an organization policy. Refer to the guidance about content rules for crafting match conditions.
-
How-To’s: Code samples, testing scripts, or other technology/specific examples of how to implement the Solution. How-Tos should give actionable steps to users in their particular context. How-To’s also have a title, text, and rules. Refer to the guidance about content rules for crafting match conditions.
Additional Requirements details
Tasks address potential problems/weaknesses in the project (for example, P408 Weak Password Requirements). In certain cases, these problems/weaknesses pertain to specific standards/regulations, such as PCI-DSS and PA-DSS.
However, a common issue is that different standards have different requirements for the same problem. To help with managing these different requirements, it is possible to create Additional Requirements for a Task.
For example, PA-DSSv2 requires that a password be at least 7 characters long, while COBIT4.1 requires that a password be at least 8 characters long. In this case, we can create an Additional Requirement for P408 to record this difference in requirements between different standards. This differs from How-To’s in that the details of implementation are not important in an Additional Requirement.
Additional Requirements have the following details:
-
Title: The title of the additional requirement.
-
Text: Specific guidance for addressing the problem in the context of this requirement. The steps are concise and link to other sources for more details, if needed.
Use Markdown to apply rich text formatting to the Text field. Markdown syntax is accessible by clicking on the box beneath the Solution. -
Rules: The section titled Applicable to a Project when the following rules are met shows the rules for the requirement.
An Additional Requirement is added to a Project Task when the rules of the Task and Additional Requirement match a project’s settings.
How-To details
How-To’s have the following details:
-
Title: The title of the How-To.
-
Text: Specific guidance about implementing the task in the context of the project.
Use Markdown to apply rich text formatting to the Text field. Markdown syntax is accessible by clicking on the box beneath the Text. -
Rules: The section titled Applicable to a Project when the following rules are met shows the rules for the How-To.
Add a custom task
Create a Custom task by following the steps below.
Prerequisites:
-
The user has the permission Global Roles→Customization→Customize content.
Steps:
-
Open the Library→Tasks page.
-
Click Add Task.
-
Fill in the required fields.
-
Click Save.
The new task is available to all projects in the system.
Update a custom task
Update a Custom task by following the steps below.
Prerequisites:
-
The user has the permission Global Roles→Customization→Customize content.
Steps:
-
Open the Library→Tasks page.
-
Search for a task from the task library.
-
Click on the title of the task.
-
Update the task by modifying its fields.
-
Click Save.
Changes to a task take effect as follows:
-
Title, Solution, How-to and Additional Requirements changes take effect immediately in all projects.
-
Problem and Rules changes apply to new projects immediately: the task will appear in the task list according to its rules.
-
Existing projects without this task, but matching the Problem and Rules, will prompt project lead users to accept the task.
-
Existing projects with this task, but no longer matching the Problem and Rules, will prompt Project Lead users to remove the task.
Update a default task
Default tasks are automatically kept up-to-date with each product update. However, changes made to a default task are not affected by product updates. A default task’s original values are displayed only when a privileged user chooses to Revert all task customizations or Revert specific task customizations.
Update a Default task by following the steps below.
Prerequisites:
-
The user has the permission Global Roles→Customization→Customize content.
Steps:
-
Open the Library→Tasks page.
-
Search for a task from the task library.
-
Click on the title of the task.
-
Update the task by modifying its fields.
-
Click Save.
After an update, a default task is assigned the type "Modified". The modified fields are marked with a green asterisk.
For example, after changing "Priority" the field appears as follows:
Changes to a task take effect as follows:
-
Title, Solution, How-to and Additional Requirements changes take effect immediately in all projects.
-
Problem and Rules changes apply to new projects immediately: the task will appear in the task list according to its rules.
-
Existing projects without this task, but matching the Problem and Rules, will prompt project lead users to accept the task.
-
Existing projects with this task, but no longer matching the Problem and Rules, will prompt Project Lead users to remove the task.
Deactivate a task
Temporarily remove a custom or default task from new and existing projects by following the steps below.
Prerequisites:
-
The user has the permission Global Roles→Customization→Customize content.
Steps:
-
Open the Library→Tasks page.
-
Search for the task using the interface and click its title.
-
Click Deactivate Task.
-
Click Confirm.
The deactivated task will not appear in new projects. It will continue to appear in existing projects until a project lead selects "Accept Content Updates".
Reactivate a task
Activate a disabled custom or default task by following the steps below.
Prerequisites:
-
The user has the permission Global Roles→Customization→Customize content.
Steps:
-
Open the Library→Tasks page.
-
Search for a task from the task library.
-
Click on the title of the task.
-
Click Reactivate Task.
-
Click Confirm.
The reactivated task will appear in new projects. It no longer appears in existing applicable projects until a project lead selects "Accept Content Updates".
Delete a custom task
Permanently delete a custom task from all projects by following the steps below.
Prerequisites:
-
The user has the permission Global Roles→Customization→Customize content.
Steps:
-
Open the Library→Tasks page.
-
Search for a task from the task library.
-
Click on the title of the task.
-
Click Delete Task.
-
Click Confirm.
The task is immediatley removed from all projects.
|
|
To limit impact on teams, it is a good practice to deactivate a task first and then delete it after a period of time. |
Delete Additional Requirements or How-To’s
You can delete a custom Additional Requirement or How-To permanently. However, built-in Requirements and How-To’s that are deleted can be restored. Permanently delete Additional Requirements and How-To’s by following the steps below.
Prerequisites:
-
The user has the permission Global Roles→Customization→Customize content.
Steps:
-
Open the Library→Tasks page.
-
Search for a task from the task library.
-
Click on the title of the task.
-
Scroll down to select an Additional Requirement or How-To.
-
Select the Delete checkbox on the right side of the page.
-
Click Save.
The custom Additional Requirement or How-To is deleted.
Restore all Additional Requirements or How-To’s
Restore Additional Requirements and How-To’s by following the steps below.
Prerequisites:
-
The user has the permission Global Roles→Customization→Customize content.
Steps:
-
Open the Library→Tasks page.
-
Search for a task from the task library.
-
Click on the title of the task.
-
Scroll down to Additional Requirements or How-To’s.
-
Select the appropriate checkbox on the right side of the page:
-
Restore all deleted Additional Requirements
-
Restore all deleted How-To’s
-
-
Click Save.
The Additional Requirements or How-To’s are restored.
Revert all task customizations
Discard all customizations to a default task and use its latest original version by following the steps below. Only original tasks can be reverted.
Prerequisites:
-
The user has the permission Global Roles→Customization→Customize content.
Steps:
-
Open the Library→Tasks page.
-
Search for a task from the task library.
-
Click on the title of the task.
-
Click Revert to Original.
-
Click Confirm.
All the changes to the task, including new How-To’s, Additional Requirements, and Solution changes are removed. The changes take effect in all projects immediately.
Revert specific task customizations
Discard certain customizations to a Default task by following the steps below.
Prerequisites:
-
The user has the permission Global Roles→Customization→Customize content.
Steps:
-
Open the Library→Tasks page.
-
Search for a task from the task library.
-
Click on the title of the task.
-
Find fields with a green asterisk to identify previously modified fields.
-
For example, the "Priority" field below has been modified.
-
-
Select the "Revert" checkbox for each field whose changes you want to undo.
-
Click Save. A dialog will appear.
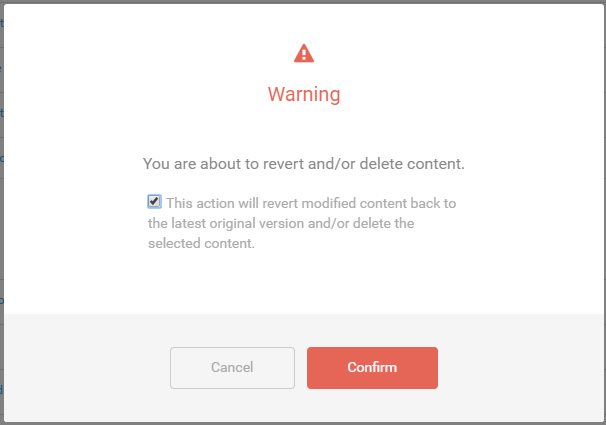
-
Acknowledge the warning and click Confirm.
The changes to the task you selected are removed. The change takes effect immediately in all projects.
|
|
If you revert a modified problem, the match conditions will also be reverted. However, custom match conditions that you add can only be reverted by the steps above. |
Apply a task tag
Task tags are displayed in a project’s task list and used to filter tasks. Follow the steps below to add a tag to an existing task.
Prerequisites:
-
The user has the permission Global Roles→Customization→Customize content.
Steps:
-
Open the Library→Tasks page.
-
Search for a task from the task library.
-
Click on the title of the task.
-
Hover your mouse over the task to see a small input box called "New Tag…"
-
Enter a tag name and press Enter.
The tag is assigned to the task.
Search for a task
Search for a Task in the library by following the steps below.
Prerequisites:
-
The user has the permission Global Roles→Customization→Customize content.
Steps:
-
Open the Library→Tasks page.
-
Click on the magnifying glass search icon on the left side of the page.
-
Search for specific tasks by name, or filter by category, phase, or tag. You can also search by type:
-
Custom & Original All tasks.
-
Custom All new custom tasks and original tasks that you have since customized.
-
Original All original tasks you have not customized.
-
Tasks matching the filter are displayed in the list view.
View a task in read-only mode
Examine a read-only version of a library task by following the steps below.
Prerequisites:
-
The user has the permission Global Roles→User Management→Modify own user settings.
-
The user does not have the permission Global Roles→Customization→Customize content.
Steps:
-
Open the Library→Tasks page.
-
Click the magnifying glass search icon on the left side of the page.
-
Search for specific tasks by name, or filter by category, phase, or tag. You can also search by type:
-
All All tasks.
-
Custom All new custom tasks you have created.
-
Modified All original tasks you have modified.
-
Original All original tasks you have not modified.
-
Tasks matching the filter are displayed in the list view. A task you select is presented in full detail, but you cannot modify it in this view.