Problems
A problem is a weakness or business-related breakdown that can affect projects under certain conditions. The application tracks an official set of problems and their conditions. However, additional problems can be managed as well.
| The official problems are read-only. |
Problem details
-
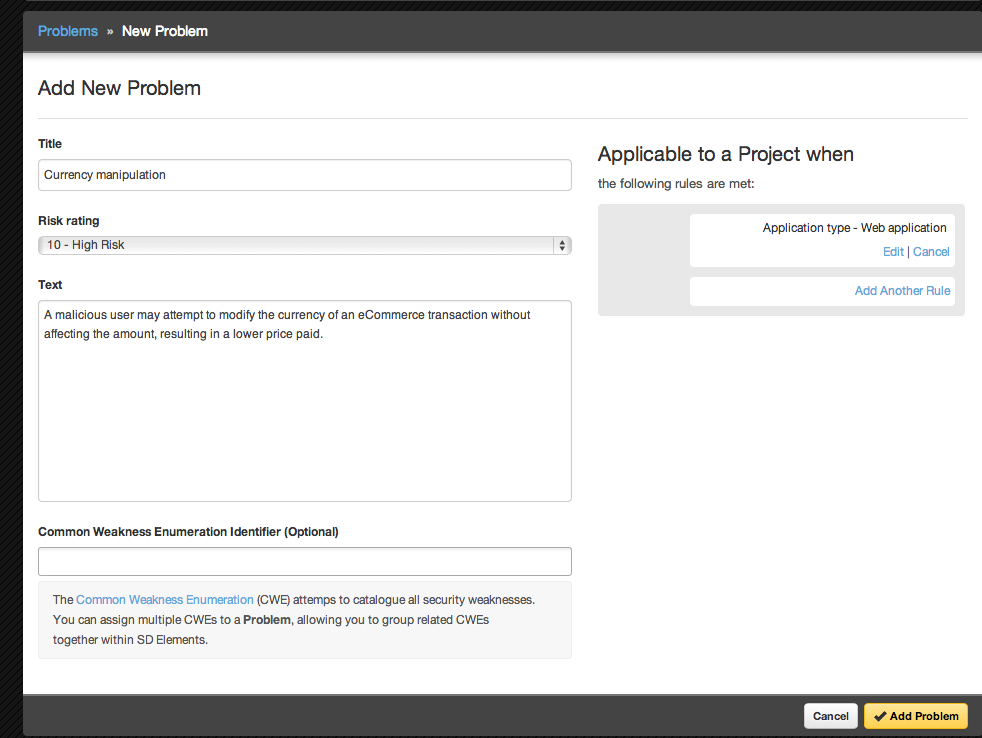
Title: The title of the problem.
-
Risk rating: The risk score of the problem, which is analogous to the priority of a task.
-
Text: A text description of the problem. A brief description of the impact of a problem not being addressed or mitigated.
This field uses Markdown for rich text formatting. -
Common Weakness Enumeration Identifier: An optional list of Common Weakness Enumeration (CWE) identifiers that track common software weaknesses.
-
Rules: The section titled Applicable to a Project when the following rules are met shows the rules for the problem. A problem always appears in a project if there are no rules.
Create a custom problem
To edit a custom problem follow the steps below.
-
The user has the permission Global Roles → Customization → Customize content.
-
Select the menu option Library → Problems.
-
Click Add Problem on the top right. A dialog will appear.
-
Fill in the required fields.

-
Click Add Problem.
The problem is added to the system: custom or orginal tasks can be associated with the new problem.
Delete a custom problem
Delete a custom problem by first moving all assigned tasks to an existing problem. To delete a custom problem follow the steps below.
-
The user has the permission Global Roles → Customization → Customize content.
-
Select the menu opton Library → Problems.
-
Search for the problem and select it.
-
Click Delete Problem.
-
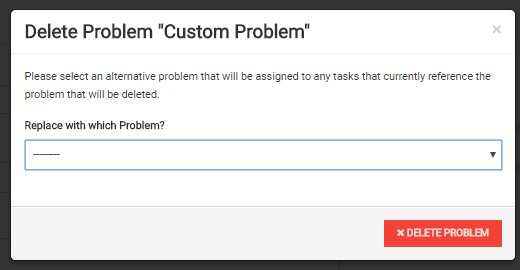
Select an existing problem to move any affected tasks.
-
Click Delete Problem.
The problem is removed from the system. All affected tasks are assigned to the selected problem.
View a problem in read-only mode
Examine a read-only version of a library problem by following the steps below.
-
The user has the permission Global Roles → User Management → Modify own user settings.
-
The user does not have the permission Global Roles → Customization → Customize content.
-
Select the menu option Library → Problems.
-
Click the magnifying glass icon on the left side of the page.
-
Search for specific problems by name, or filter by CWE. You can also search by type:
-
Custom & Original All problems.
-
Custom All custom problems.
-
Original All original problems.
-
Problems matching the filter are displayed in the list view. A problem you select is presented in full detail, but you cannot modify it in this view.
Edit a Library Problem
Make custom changes to the title, risk rating, or text of an existing Library Problem.
-
The user has the permission Global Roles → Customization → Customize content.
-
Select the menu option Library → Problems.
-
Select the Problem that you want to customize.
-
Edit any of the following fields:
-
Title
-
Risk rating
-
Text
-
-
Click Save Problem.
The custom Library Problem is saved with its new details and now appears as Modified in the Library.
Revert changes to a Library Problem
Return any modified fields of a Problem back to their original content.
-
The user has the permission Global Roles → Customization → Customize content.
-
Select the menu option Library → Problems.
-
Select the modified Problem containing content that you want to revert.
-
Select the Revert checkbox for any of the following fields:
-
Title
-
Risk Rating
-
Text
-
-
Click Save Problem.
The modified fields of the Problem that you selected are reverted back to their default details.
Custom rules
In addition to creating your own Library Problems with optional rules, you can do the following with built-in SD Elements Problems:
-
Create custom rules
-
Edit existing rules
-
Delete one or more rules
-
Revert all rule changes and additions
Create a custom rule
To create a custom rule for a built-in Problem, follow the steps below.
-
The user has the permission Global Roles → Customization → Customize content.
-
Select the menu option Library → Problems.
-
Select the Problem that you decided should have a new rule.
-
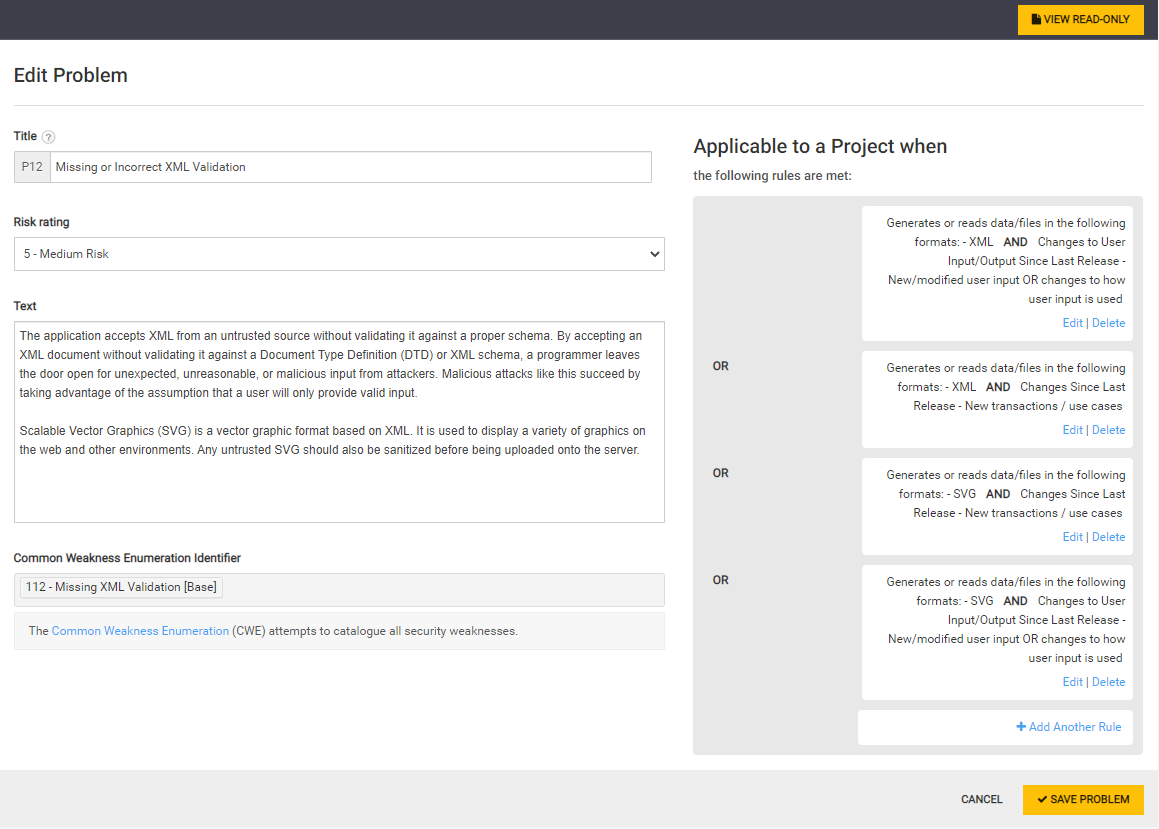
Click Add Another Rule at the bottom of the Applicable to a Project when section.
-
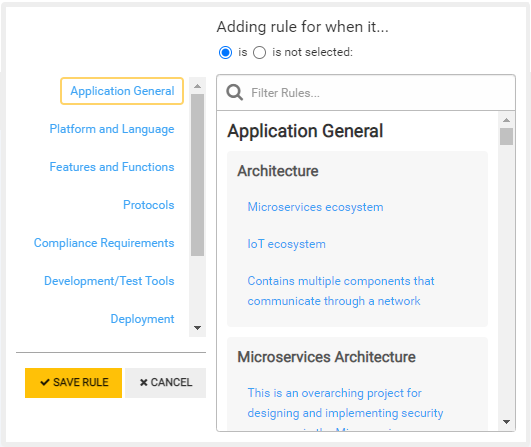
Select one or more match conditions for the rule.
-
Click Save Rule.
-
Click Save Problem at the bottom right of the Edit Problem page.
Edit a rule
To edit a rule for a built-in Problem, follow the steps below.
-
The user has the permission Global Roles → Customization → Customize content.
-
Select the menu option Library → Problems.
-
Select the Problem that has a rule you decided needs editing.
-
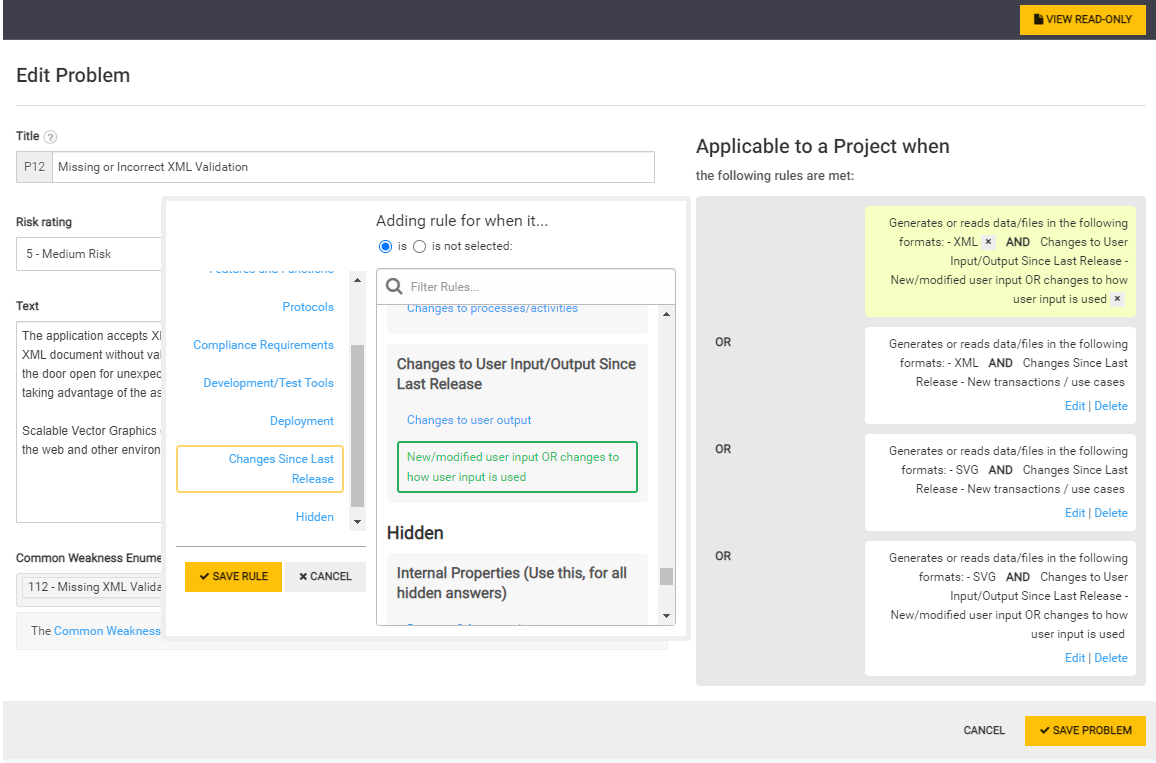
Click Edit at the bottom of the rule you want to edit.
-
Select or deselect match conditions until the rule is satisfactory.
-
Click Save Rule.
-
Click Save Problem at the bottom right of the Edit Problem page.
Delete a rule
To delete a rule from a built-in Problem, follow the steps below.
-
The user has the permission Global Roles → Customization → Customize content.
-
Select the menu option Library → Problems.
-
Select the Problem that has a rule you don’t need.
-
Click Delete at the bottom of the unwanted rule.
-
Click Save Problem.
Revert changes made to a custom rule
To revert all changes made to rules for a built-in Problem, follow the steps below.
-
The user has the permission Global Roles → Customization → Customize content.
-
Select the menu option Library → Problems.
-
Select the Problem that has rule changes you want to revert.
A green asterisk beside the Applicable to a Project when section heading indicates that the Problem contains at least one modified rule. 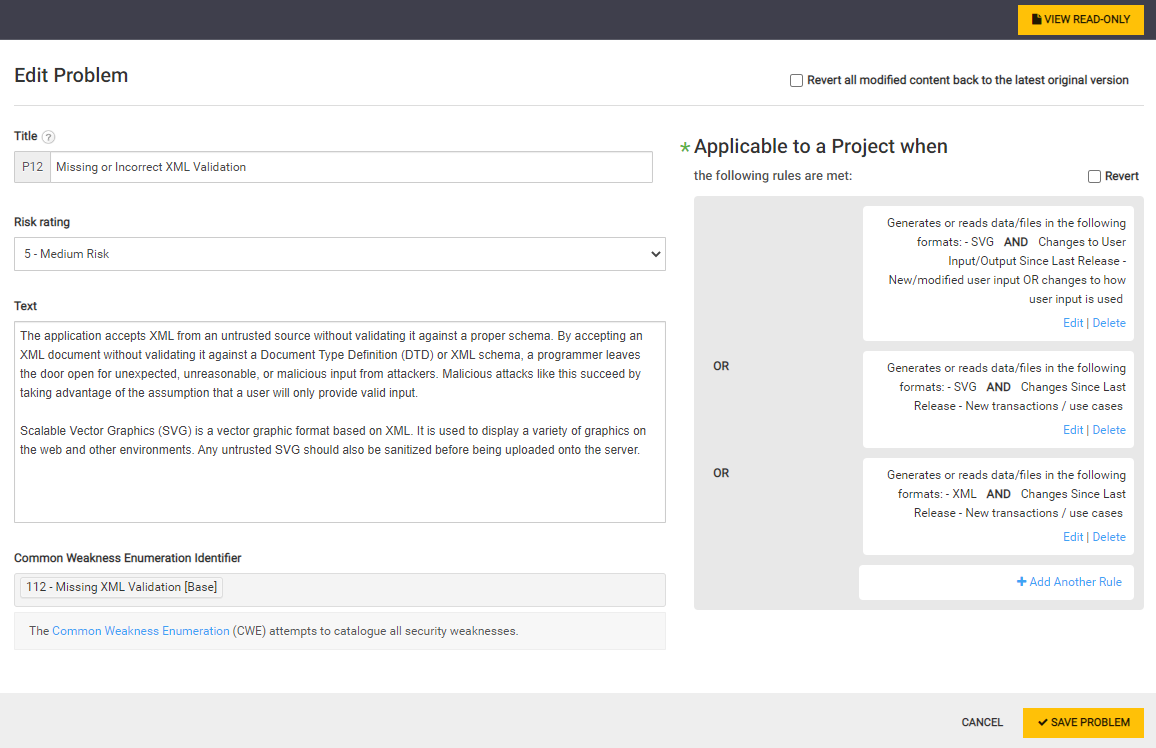
-
Select the Revert checkbox located above the list of current rules.
-
Click Save Problem. A confirmation dialog will appear.
-
Select the warning’s checkbox to verify that you want to revert all content.
-
Click Confirm.
All rules for the Problem revert to their original content.
