Project Issue Tracker connections
A project Issue Tracker connection links an SD Elements project with a project in another Issue Tracker tool through an existing system connector.
Add/Edit a project Issue Tracker connection
Create or update an existing project Issue Tracker connection by following the steps below.
-
The user must satisfy one of the following:
-
Is a member of the project’s business unit and has the permission Global Roles→Administration→Edit all projects.
-
Is a member of the project and has the permission Project Roles→Project Management→Sync with Issue Tracker tools.
-
Is a member of the project and has the permission Global Roles→Integration→Edit Issue Tracker connections.
-
-
Select a project, then select the Integration tab.
-
Select the Issue Tracker tab.
-
The project Issue Tracker integrations page appears.
-
-
To add a connection, click the plus [add circle] button on the right.
-
To edit an existing connection, click the connection name.
-
-
Enter the following information:
-
Parent: Select the system integration connection for the Issue Tracker tool, such as JIRA or CA Agile Central.
-
If you do not see the appropriate system connector in the Parent list, contact your administrator to request a new system connector.
-
-
Connection Name: Enter a name for the connection.
-
-
Additional configuration fields appear.
-
Refer to the Issue Tracker tool’s configuration guidance for more details.
-
It is very important that you enter the correct values for these fields instead of using the default values to ensure the integration is successful.
-
-
Click Test Connection at the bottom-left of the dialog.
-
Click Done at the bottom of the page.
The connection is ready to sync.
Test an Issue Tracker connection
To test the configuration of an Issue Tracker connection follow the steps below.
-
The user has the permission Project Roles→Integration→Sync with Issue Tracker tools.
-
Select a project, then select the tab Issue Tracker.
-
The project Issue Tracker integrations page appears.
-
-
Click the connection name.
-
Click Test Connection at the bottom-left of the dialog.
The system will connect to the Issue Tracker and verify the provided configuration. A message will appear on the bottom-right with either a pass:

or an error:

In the case of an error, the details will be displayed at the bottom of the connection’s form.
Delete a project Issue Tracker connection
Delete a project Issue Tracker connection by following the steps below.
-
The user has the permission Project Roles→Integration→Sync with Issue Tracker tools.
-
Open the project task list page.
-
Select the Issue Tracker tab.
-
Search for the connection from the list.
-
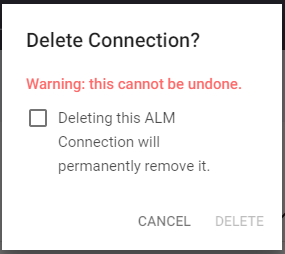
Hover your mouse over the row on the far right and select the trashcan [delete] icon. A dialog will appear.
-
Acknowledge the warning.
-
Click Delete.
The connection is removed from the project and no future sync operations will occur. No changes are made to any issues in the Issue Tracker project.
Synchronize tasks
After creating a connection between your SD Elements project and an Issue Tracker project, SD Elements tasks will synchronize to the Issue Tracker project according to your selection.
For example, if you selected an automatic synchronization frequency (such as hourly or daily), synchronization will occur at the scheduled time. If you selected manual synchronization, you must click the Sync button on the Issue Tracker Integrations page to synchronize the SD Elements tasks with your Issue Tracker project.
-
The user has the permission Project Roles→Integration→Sync with Issue Tracker tools
-
Open the project’s list of Issue Tracker connections.
-
Search for the desired connection from the list.
-
Click the connection’s Sync button.
The synchronization process is initiated. It may take a few minutes or more, depending on the number of tasks in scope for integration and the latency between SD Elements and the Issue Tracker server.
During synchronization, SD Elements will attempt to add tasks to the Issue Tracker project if they do not already exist. SD Elements will add a note to each synchronized task with a reference to the new item created in the Issue Tracker system.
Project Issue Tracker connection status
A project’s Issue Tracker integrations page shows the synchronization status of each connection. The status of an integration will be shown in the "Status" column, having one of four values:
-
Ready: The integration is ready to be run.
-
In progress: The integration is underway.
-
Failed: An error occurred during synchronization.
-
Click the red exclamation mark to view further details.
-
Check that the user has sufficient permission
-
Use Test Connection to troubleshoot further. and any required fields are set for a new Issue Tracker issue.
-
-
Completed: The integration is successful, see the Issue Tracker project for SD Elements tasks.