System Verification connectors
A system Verification connector captures general configuration settings that are applied to all SD Elements project Verification connections linked to it.
Security sensitive configurations such as server, username, and password, as well as common settings, are generally set at the system level.
-
Consistency: Issue Tracker connections based on a system connector share the same underlying configuration.
-
Confidentiality: Project teams can connect to an Issue Tracker without ever knowing the credentials used to connect with the system.
Add/Edit a Verification connector
Add or update a system Verification connector by following the steps below.
-
The user has the permission Global Roles→Integration→Edit verification connections.
-
The username/password or API token needed to connect with the verification.
-
From the gear icon [settings] menu, select Integration.
-
Select the Verification tab.
-
To add a connection, click the plus [add circle] button.
-
To edit an existing connection, hover your mouse over the row on the far right and select the edit [edit] icon.
-
-
Enter the following information:
-
Name: Enter a name for the connection.
-
System: Select the appropriate verification (such as HP Fortify or Veracode).
-
-
Enter the requested configuration for the selected verification.
ImportantIt is very important that you enter the correct values for these fields instead of using the default values to ensure the integration is successful. -
Click Create or Done at the bottom of the form.
The connector changes take effect in the system immediately. Projects can use the new settings in new or existing connections.
|
Note
|
Most errors during a verification setup and execution are due to insufficient permissions. |
Delete a Verification connector
Delete a Verification connector by following the steps below.
-
The user has the permission Global Roles→Integration→Edit verification connections.
-
From the gear icon [settings] menu, select Integration.
-
Search for the connection you wish to delete.
-
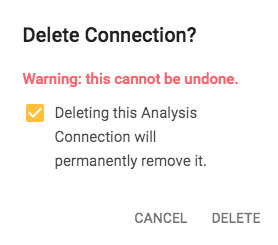
Hover your mouse over the row on the far right and select the trashcan [delete] icon. A dialog will appear.
-
Acknowledge the warning.
-
Click Delete.
The Verification connector is removed from the system as well as any Verification connections tied to it.