Import/Export
In this section:
The Import/Export feature allows users to export library content into an Excel or CSV file (Problems, Tasks, How-Tos, Amendments and Glossary Terms). Files can be edited and reimported to update corresponding Library content in the system. In addition, a full library can be downloaded as an export-only ZIP file.
|
|
You cannot delete library content items through a library import. You can create new items and change existing items when appropriate, but you can never delete existing items. |
File format
Supported formats for the import/export feature are:
-
xlxs (Excel) (Recommended when opening in Microsoft Excel.)
-
csv (Comma Separated Values format.)
The full library export-only format is available as:
-
ZIP (Compressed file format)
Download full library in export-only format
Export the SD Elements content library for backup or to help with tracking changes. Follow the steps below to trigger an export:
Prerequisites:
-
The user has the permission Global role→Customization→Customize content.
Steps:
-
Click Library→Tasks.
-
Select the Export file_download icon.
-
Click Download.
The downloaded ZIP file contains low-level details about content (amendments, how-to’s, problems, survey, and tasks) including match conditions.
Export template/file structure
Use a content template as a basis for importing content to the system. To retrieve the template, follow the steps below:
Prerequisites:
-
The user has the permission Global role→Customization→Customize content.
Steps:
-
Click Library→Import/Export.
-
Select the Export tab.
-
Under Templates, select the Empty option.
-
Select a File Type.
-
Click Export.
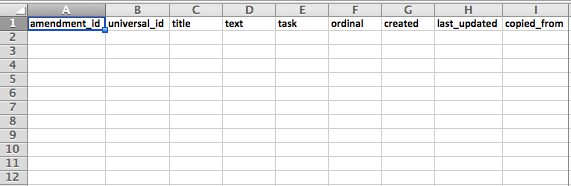
The template defines the headers you require, as illustrated below:
Export all content
Export the SD Elements content library for offline reading, making a backup, or modifying and reimporting it. Follow the steps below to trigger an export:
Prerequisites:
-
The user has the permission Global role→Customization→Customize content.
Steps:
-
Click Library→Import/Export.
-
Select the Export tab.
-
Under Templates, select the All Data option.
-
Select a File Type.
-
Click Export.
Export specific content
Only export the content of Tasks, Problems, or Glossary items.
Prerequisites:
-
The user has the permission Global role→Customization→Customize content.
Steps:
-
Click on one of the following:
-
Library→Tasks to export Tasks.
-
Library→Problems to export Problems.
-
Library→Glossary to export Glossary items.
-
-
Select the Export tab.
-
Under Templates, select the All Data option.
-
Select a File Type.
-
Click Export.
The library content you select is then exported in the format of your choosing.
Export specific content template
Use a content template as a basis for importing specific content to the system. Supported types are Tasks, Problems, and Glossary items. To retrieve a template, follow the steps below:
Prerequisites:
-
The user has the permission Global role→Customization→Customize content.
Steps:
-
Click on one of the following:
-
Library→Tasks.
-
Library→Problems.
-
Library→Glossary.
-
-
Select the Export tab.
-
Under Templates, select the All Data option.
-
Select a File Type.
-
Click Export.
The file template content you select is then exported in the format of your choosing.
Import content
Submit bulk changes to the content library using the import function. Up to 5 files are supported in a single import.
Prerequisites:
-
The user has the permission Global role→Customization→Customize content.
Steps:
-
Click on Library→Import/Export.
-
Select the Import tab.
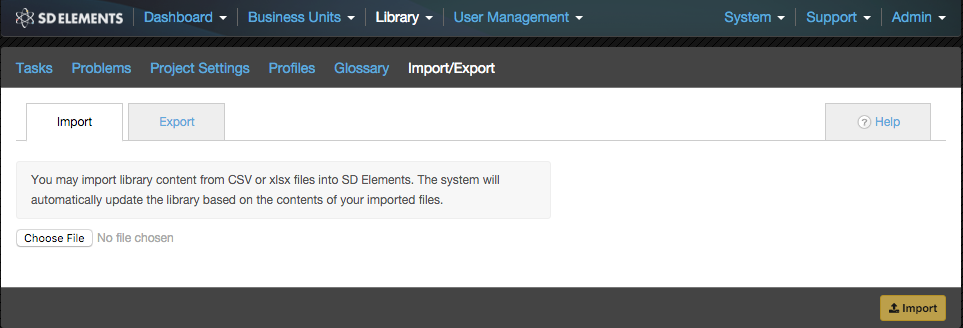
-
Click Choose File and select the .xlsx or .csv file containing your changes. If you have up to 5 files, click on Choose File and select each one.
-
Click Import.
-
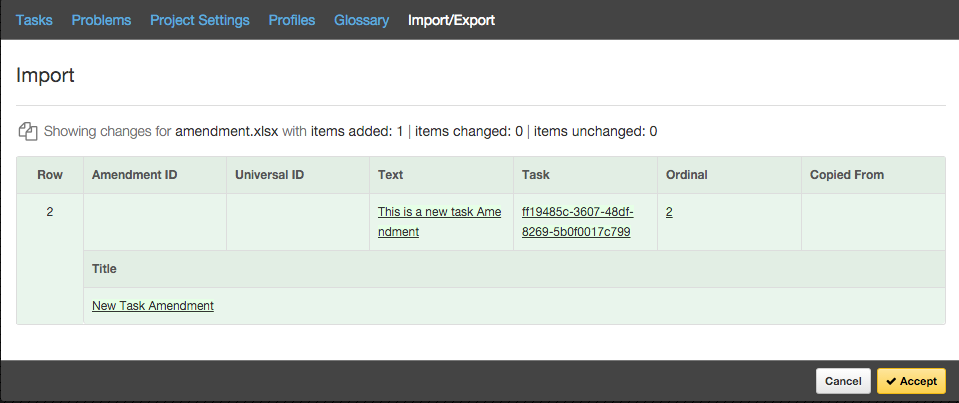
Review the changes detected by the system.
-
New content will be displayed in green, and any old content (that will be overwritten) is displayed in red.
-
Only new or updated rows will be displayed.
-
-
Apply the changes by clicking Accept. Otherwise, click Cancel to abandon the import.
|
|
Review the changes carefully. You cannot reverse an import once you apply it. |
Troubleshooting
An error will be displayed if you import an unsupported file. For example:
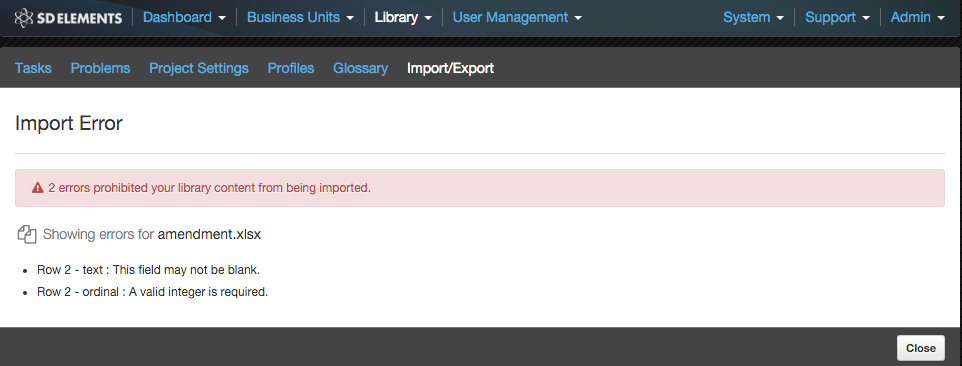
Solution:
-
Make any required changes to the file.
-
Click Close.
-
Restart the import process with the updated file.