Weaknesses view
Table of Contents
- Access the Weaknesses view
- Update Related Countermeasures
- Add a Library Weakness to the project
- Remove a manually added Library Weakness from the project
- Add a project-specific Weakness to the project
- Remove a project-specific Weakness from the project
- Filter Weaknesses
- Carry over project Weaknesses
The Weaknesses view bolsters your threat modeling by providing visibility into the risks your projects face. Use the Weaknesses view to highlight the vulnerabilities your application faces and gain insight into the Countermeasures that have been assigned to you based on the project Survey.
Access the Weaknesses view
Prerequisites:
-
The user is a member of the project and has the permission Project Roles→Project Management→View Project.
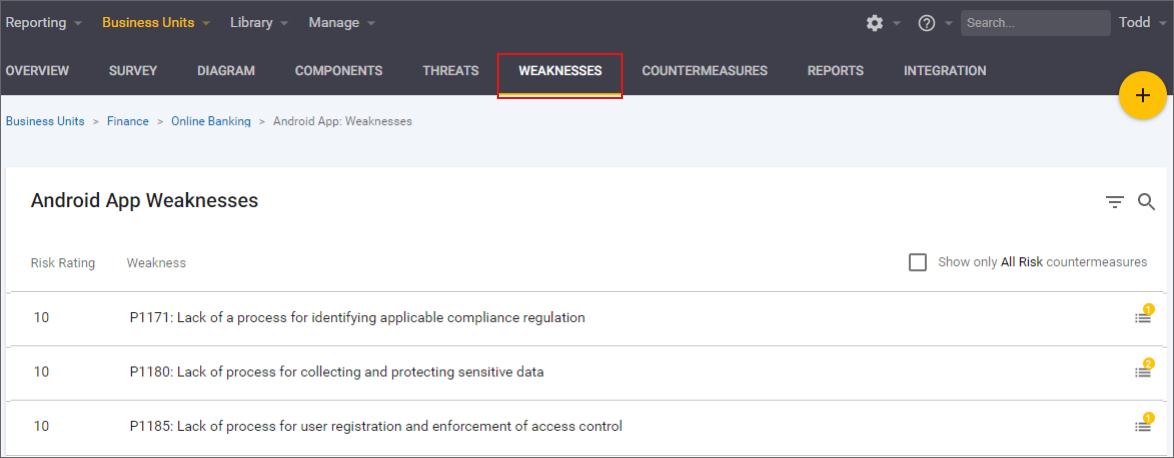
Access the Weaknesses view to see all Weaknesses assigned to your project by the Survey. Weaknesses are automatically sorted by risk rating.
Steps
-
From the Business Units menu, access your project.
-
Select the Weaknesses tab to see a list of all Weaknesses associated with your project.
-
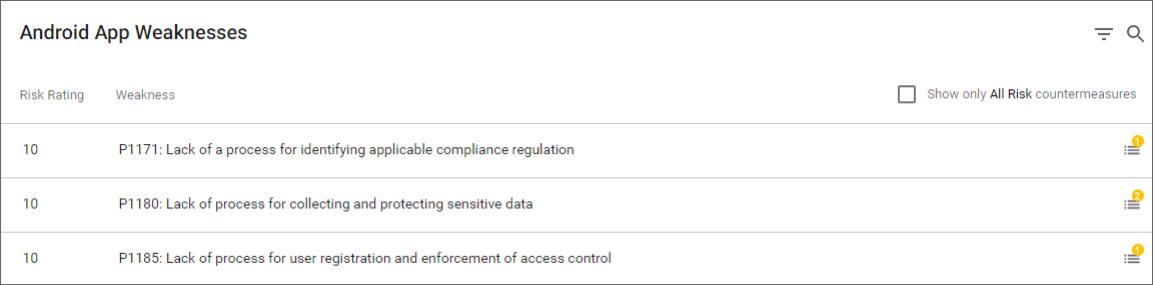
Search by Weakness ID or keywords in the title, description, or related Countermeasure titles, and filter by Risk Rating (see 1 on the image below).
-
Select whether you would like to show only Countermeasures from a relevant risk policy (see 2 on the image below).
-
Select the Description icon to see the Weakness' description (see 3 on the image below).
-
Select the Related Countermeasures icon to see the number of Countermeasures related to this Weakness and the titles of related Countermeasures (see 4 on the image below).

From this view, you can also access the Countermeasure details for Related Countermeasures by clicking on the Countermeasure title.
Update Related Countermeasures
Prerequisites:
-
The user is a member of the project and has the permission Project Roles→Project Management→View Project.
From Related Countermeasures under the Weaknesses view, you can see Countermeasures related to a particular Weakness assigned to your Project. From this view, you can update the status of a Countermeasure or assign users.
Steps
-
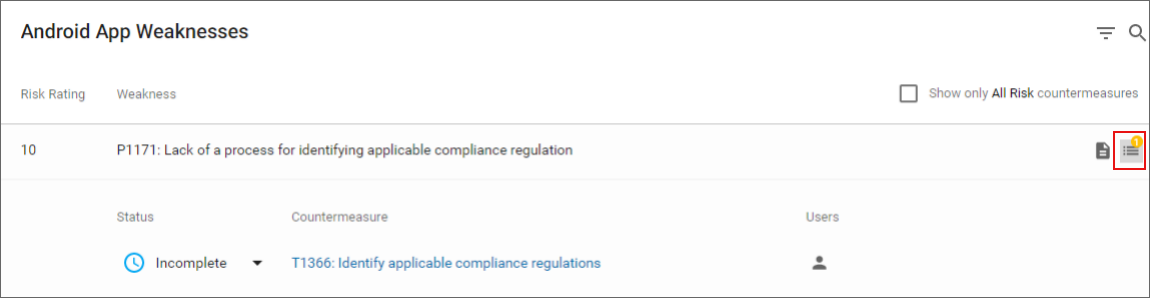
From the Weaknesses tab, select a Weakness from the table and click on the Related Countermeasures icon.
-
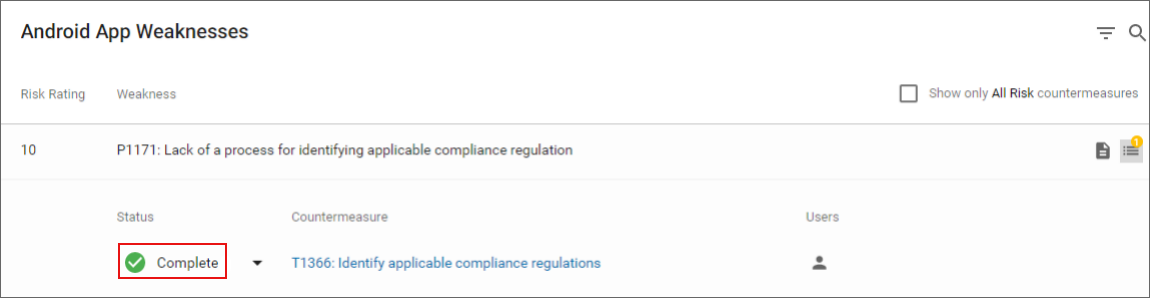
From Related Countermeasures, you can modify the status of a Countermeasure by clicking on the Countermeasure status icon.
-
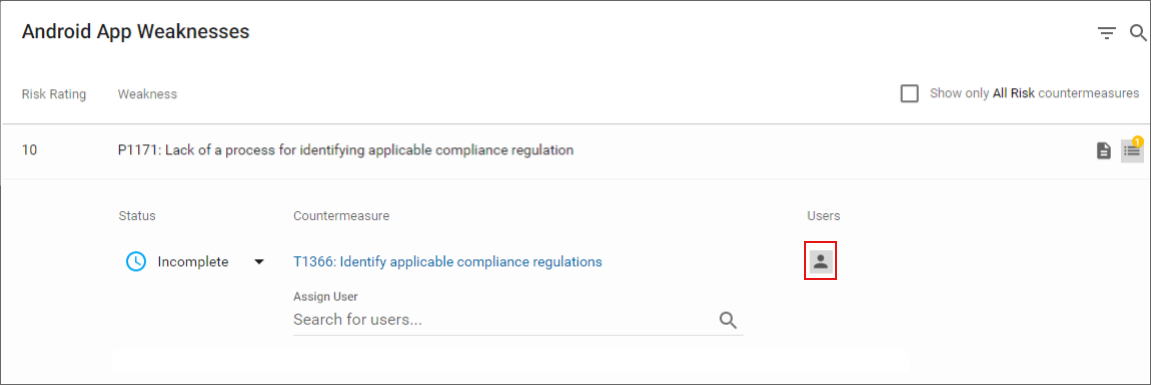
From Related Countermeasures, you can also assign users to the Countermeasure by clicking on the person icon.
Once you modify a Countermeasure status or add users for one Countermeasure, you can continue onto the next in the list or select another Weakness.
Add a Library Weakness to the project
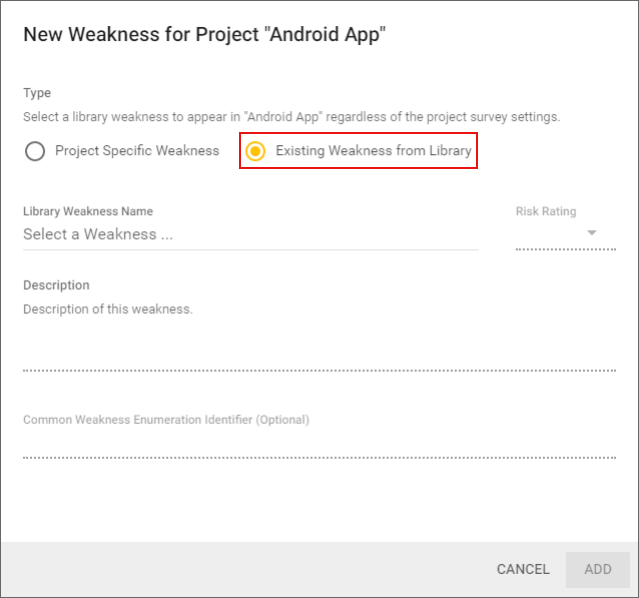
From the Project view, you can add a Weakness from the SD Elements Library to your project. Use this when you want to add a Weakness that is not related to your Survey settings.
Prerequisites:
-
The user is a member of the project and has the permission Project Roles→Project Management→Edit Project Details.
Steps
-
From the Business Units menu, access your project.
-
Select the Weaknesses tab to see a list of all Weaknesses associated with your Project.
-
Click the plus button.
-
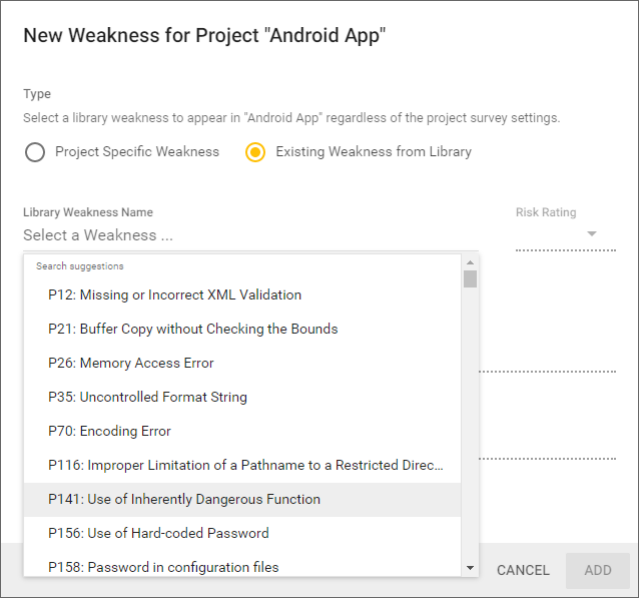
Select a Library Weakness from the dropdown list or type a search query.
-
Click on Add.
The Library Weakness is added to your project. Note that you cannot modify the contents of a Library Weakness from this view.
Remove a manually added Library Weakness from the project
Prerequisites:
-
The user is a member of the project and has the permission Project Roles→Project Management→Edit Project Details.
Steps
-
From the Business Units menu, access your project.
-
Select the Weaknesses tab to see a list of all Weaknesses associated with your Project.
-
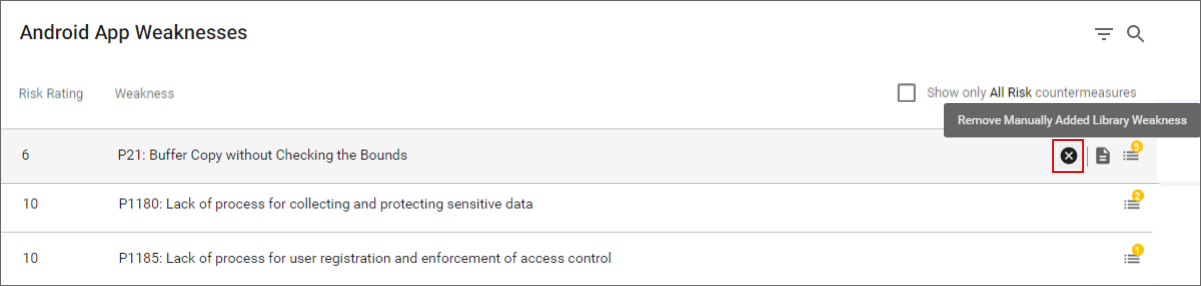
Hover the cursor over the Weakness you want to delete and click on the button to remove a manually added Library Weakness.
-
Confirm that you want to remove the Weakness with the warning dialogue.

-
Click Remove.
The manually added Library Weakness as well as its associated Countermeasures, tags, and notes are removed from your project.
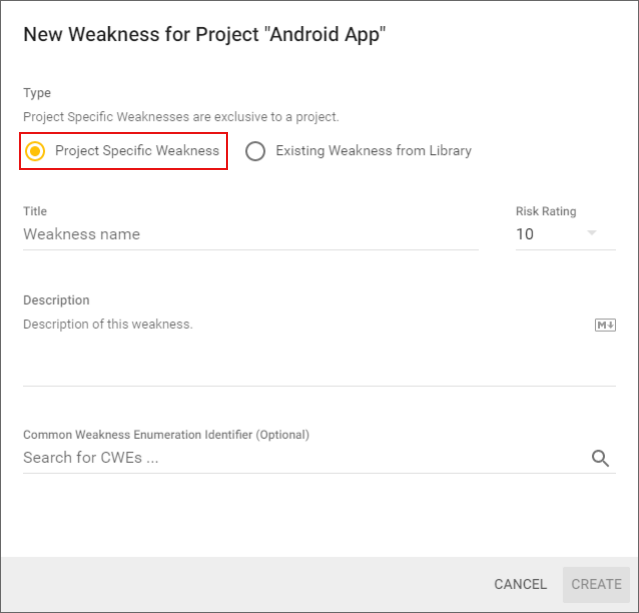
Add a project-specific Weakness to the project
From the Project view, you can create a Weakness specific to your project that does not exist in the SD Elements Library. Use this when you want to create and add a new Weakness on the fly that is relevant to your current project.
Prerequisites:
-
The user is a member of the project and has the permission Project Roles→Project Management→Edit Project Details.
Steps
-
From the Business Units menu, access your project.
-
Select the Weaknesses tab to see a list of all Weaknesses associated with your Project.
-
Click the plus button.
-
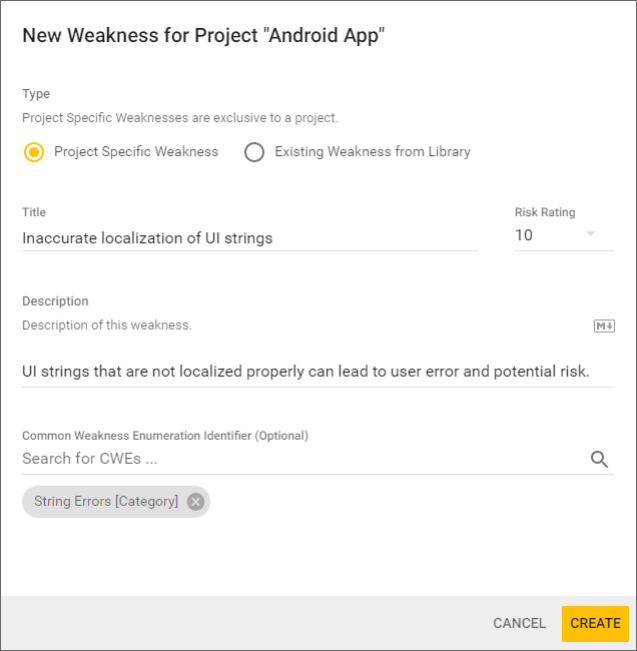
Create a Weakness by filling in the fields:
-
Weakness name: The name of the Weakness.
-
Risk Rating: Select a risk rating from 1-10, where a higher number denotes more risk.
-
Description: The explanation of what this Weakness addresses with relevant definitions of terms and concepts as required.
-
Common Weakness Enumeration Identifier (Optional): Search or select a CWE from the list.
-
-
Click on Create.
The new Weakness is created and added to your project’s list of Weaknesses. You may click on the edit icon to update any fields.
Remove a project-specific Weakness from the project
Prerequisites:
-
The user is a member of the project and has the permission Project Roles→Project Management→Edit Project Details.
Steps
-
From the Business Units menu, access your project.
-
Select the Weaknesses tab to see a list of all Weaknesses associated with your project.
-
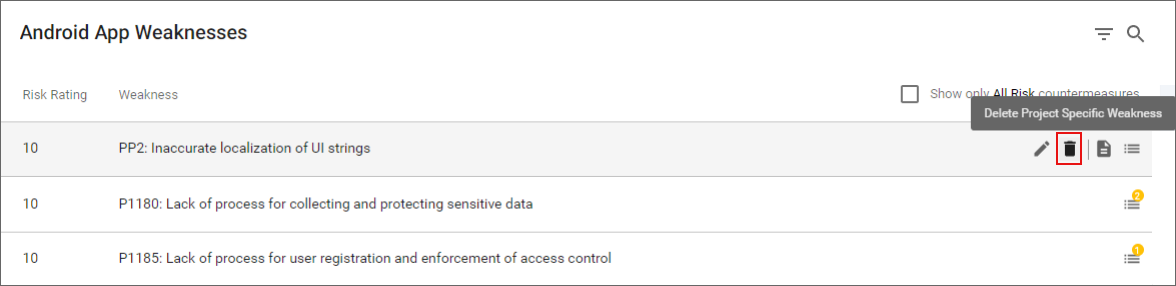
Hover the cursor over the Weakness you want to delete and click on the button to remove a Project Specific Weakness.
-
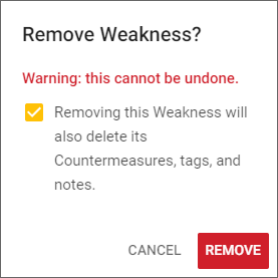
Confirm that you want to remove the Weakness with the warning dialogue.
-
Click Remove.
The project-specific Weakness is removed from your project.
Filter Weaknesses
Prerequisites:
-
The user is a member of the project and has the permission Project Roles→Project Management→View Project.
The project filter can be used to search for Weaknesses matching certain criteria. It is also useful to help prioritize which Weaknesses to focus on. For instance:
-
"Find Weaknesses with high risk and have Countermeasures that are high priority"
-
"Find Weaknesses that have incomplete Countermeasures"
-
"Find Weaknesses that should be assigned to manual testers"
Steps:
-
Click on the filter icon in the top right of the page.

-
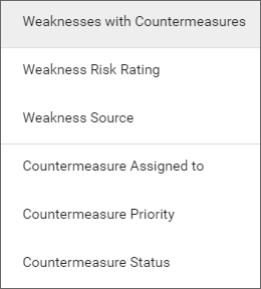
Use one or more of the options to filter the Weaknesses. Filtering Weaknesses by Weakness risk rating, Weakness source, assigned user, Countermeasure priority, and Countermeasure status is supported.
The Weaknesses are now filtered based on your selection.
Carry over project Weaknesses
You can transfer project Weaknesses to new releases using advanced options.
Steps:
-
From the Business Units menu, access your project.
-
Click on the Overview tab.

-
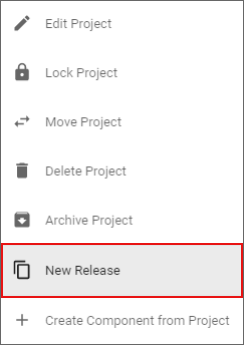
Click on the More options icon and select New Release.
-
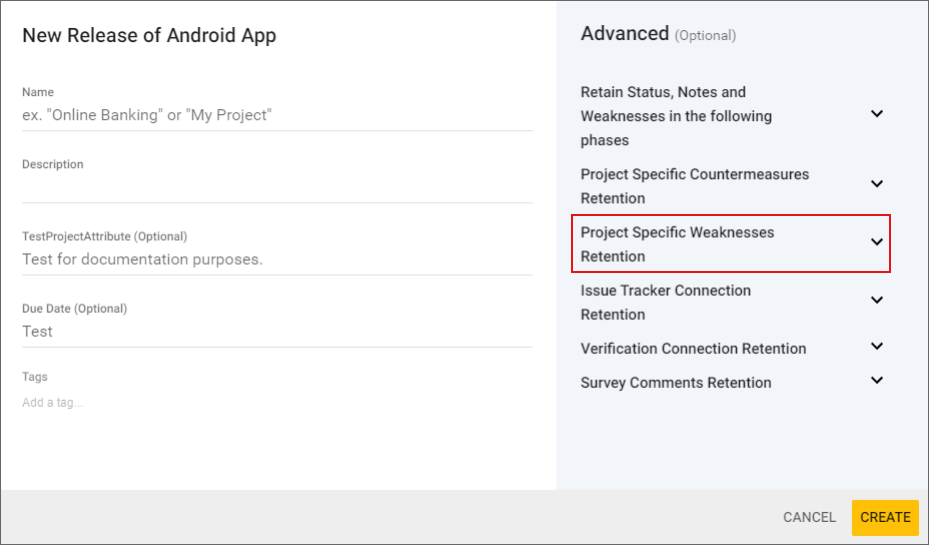
From the New Release pop over menu, select Project Specific Weaknesses Retention.
-
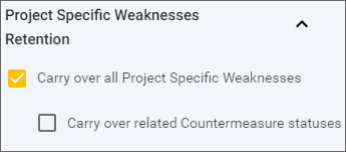
Check the option to Carry over all Project Specific Weaknesses.
-
Optionally, you can choose to carry over related Countermeasure statuses by checking the secondary box.
-
-
Click Create.
Your project Weaknesses (and optionally your Countermeasure statuses) are carried over to the new release.