The Diagram tool
Table of Contents
Use the SD Elements Diagram tool for communicating visual threat model information to your development team as well as to other teams and departments.
| The Diagrams feature is disabled by default. Any user with an Administrator role or the Manage features permission can enable the functionality. |
Enable diagrams
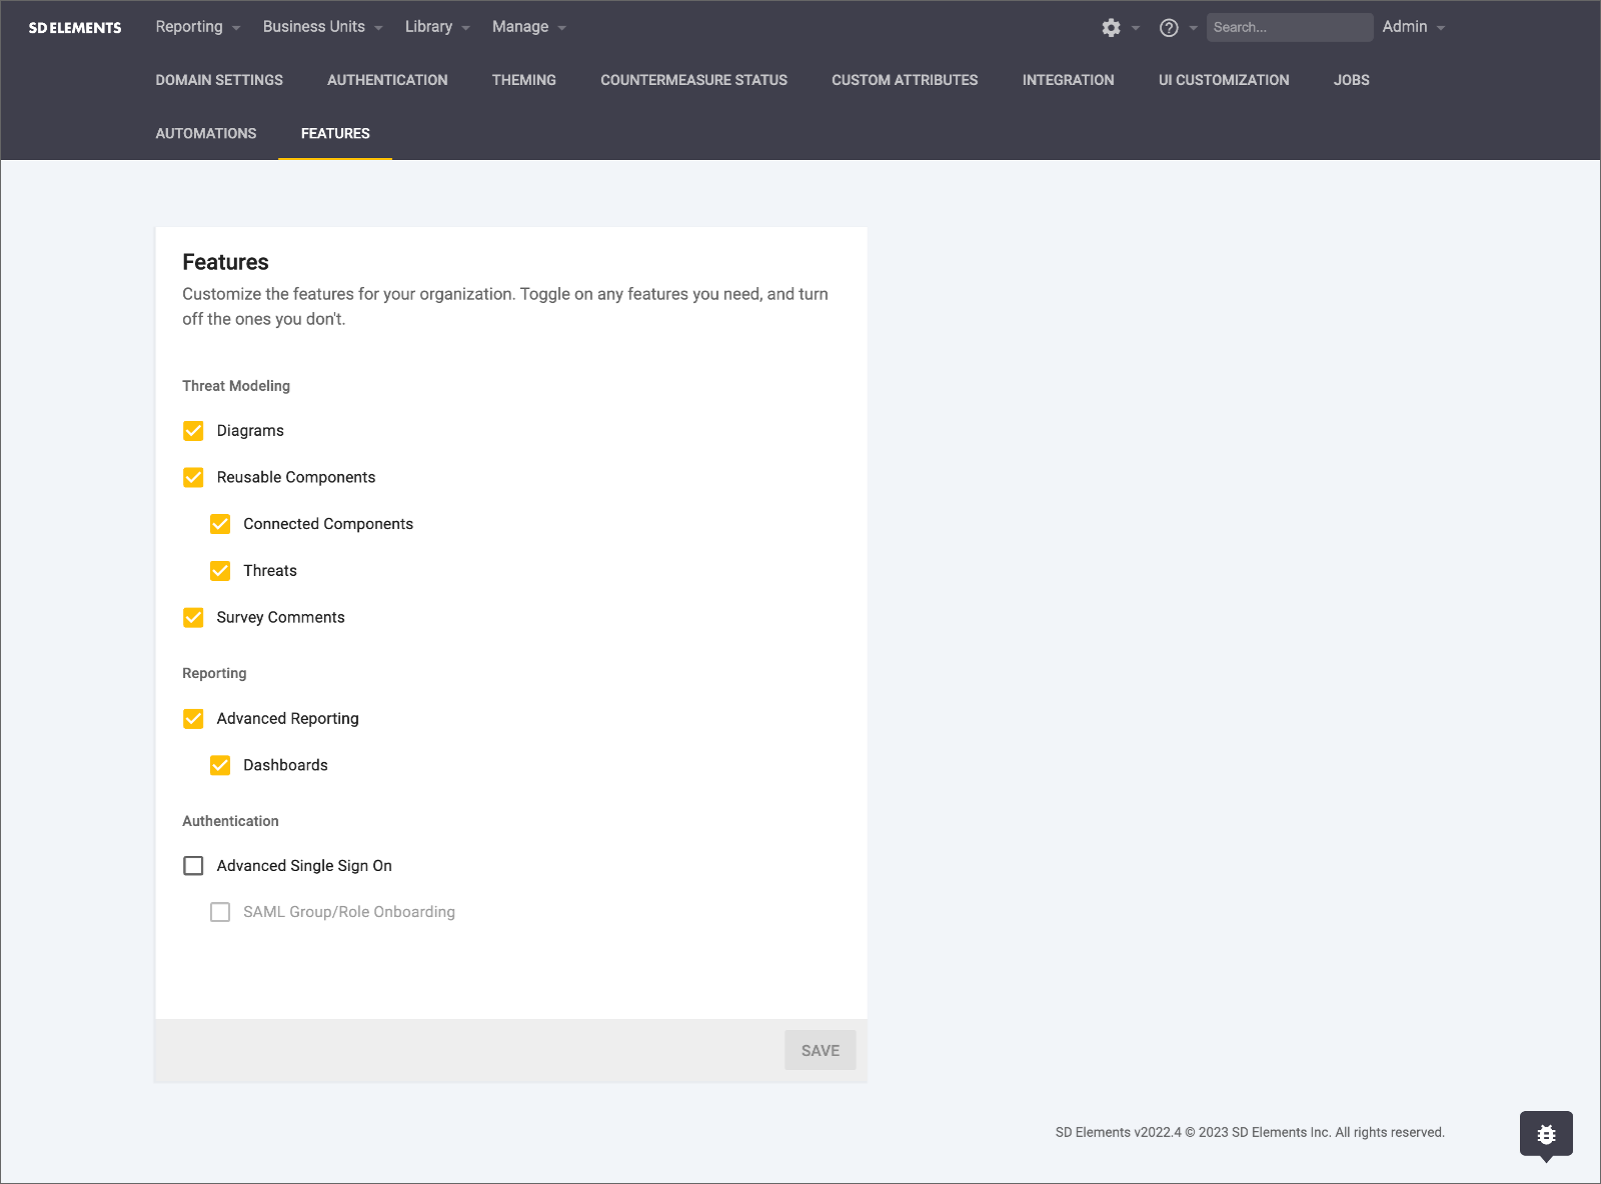
Before diagrams become available to use in projects, administrators must enable the feature. This is a one-time operation and also requires that you enable Reusable Components.
We have a beta where diagrams generate Threats, Weaknesses and Countermeasures. In order to access this functionality, you turn it on via the API with the Decision Engine feature flag, as a user with permissions to turn on feature flags.
Prerequisites:
-
The user has the permission Organization → Manage features.
Steps:
-
Navigate to the System (gear icon) tab.
-
Select Features.
-
Check the Diagrams checkbox.
-
Ensure that Reusable Components is also checked.
-
-
Click Save.
The diagrams feature is now activated and available for use in this SD Elements instance.
Create a diagram
Diagrams supplement the Survey. Diagramming activities are optional, and survey answers that correspond to an element on a diagram will be pre-populated.
To create a threat model diagram, follow the steps below.
Prerequisites:
-
The user has the permission Project role→Project Management→Edit project survey.
Steps:
-
Complete and save the Survey.
-
The selection of specific answers in the Project Survey automatically places corresponding icons on the diagram canvas when you generate the diagram.
-
The selection of specific components in the Survey automatically places corresponding icons on a digital canvas.
-
-
Click Continue to diagram.
-
The Diagram canvas opens.
-
-
Click Generate a diagram.
-
Icons representing the system components selected in Survey Answers appear on the canvas.
-
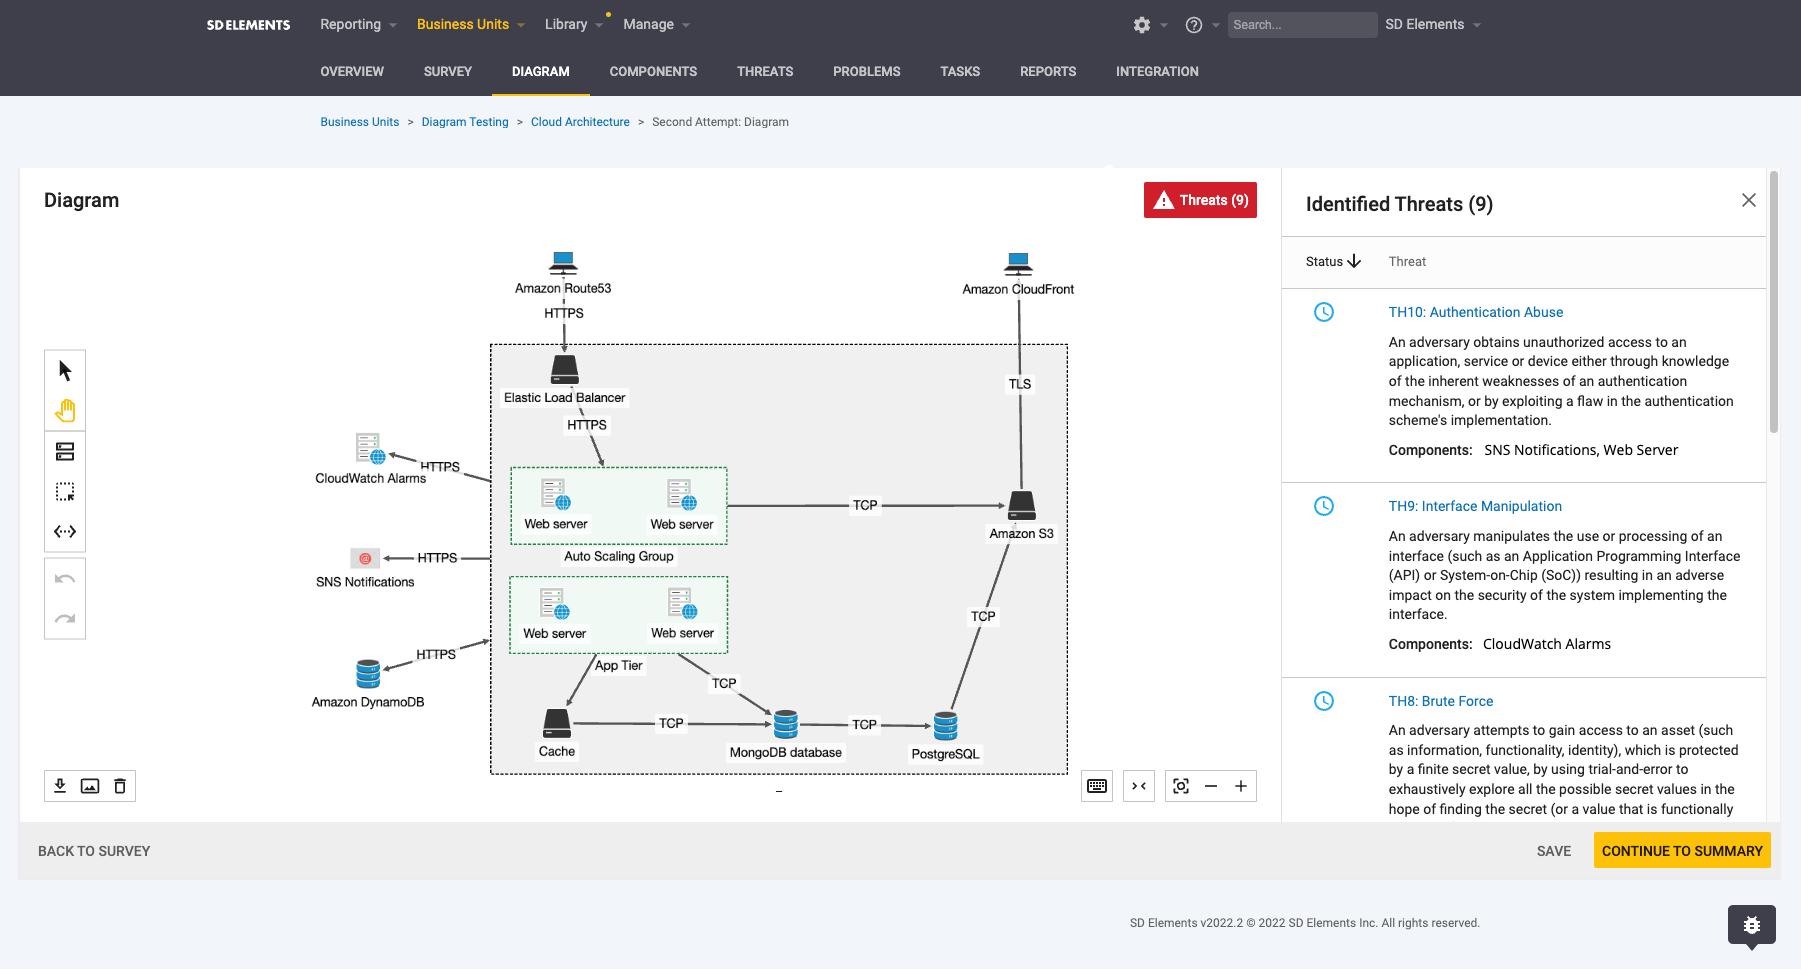
Diagram canvas
The Diagram canvas opens after you complete a project Survey and click Continue to diagram. Upon opening, the canvas is blank.
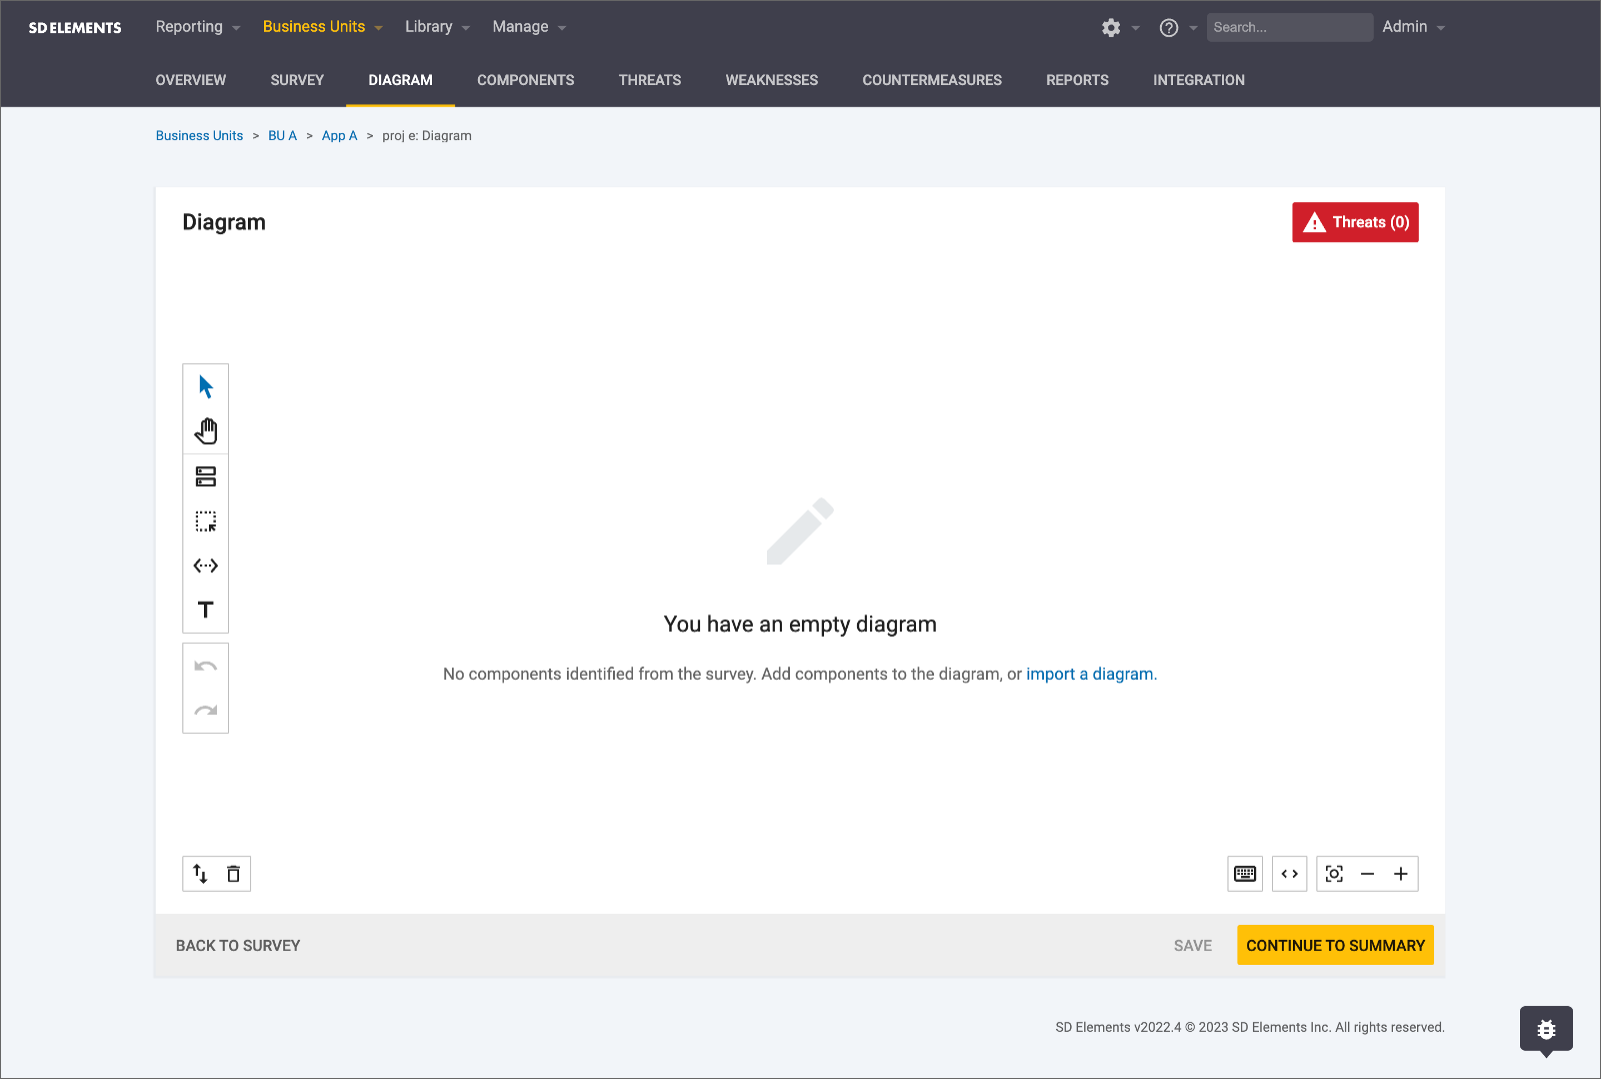
Icons, representing project components selected in the Survey, become visible when you click Generate a diagram. After generating a diagram on the canvas, you can edit, share, or lock it.
The canvas allows you to save the diagram, go back to the survey, or continue to the project summary page.
Diagram controls
The Diagram tool offers three sets of controls found on the canvas.
1. Threat modeling
-
 Rearrange icons to better visualize the system being diagrammed.
 -
 Move the canvas to better visualize the system being diagrammed.
 -
 Add component icons to fill gaps in the system visualization.
 -
 Group icons to emphasize components that are associated within trust zones.
 -
 Connect icons to illustrate data flow among system components.
 -
 Use text boxes to add notes to a diagram.
 -
 Undo or redo your previous action.
 -
 Import a TM7 or draw.io diagram, or export your diagram as a JSON or PNG file.
2. Save and delete
-
 Import the diagram as a TM7 or diagrams.net file or export the diagram as a JSON or PNG file, if desired, to create an archive of threat modeling efforts. Exported diagrams are shareable.
 -
 Delete the diagram.
3. Resizing and shortcuts
-
 Resize the canvas to the full width of your screen or collapse it to its original size.
 -
 Recenter the view of the canvas, or zoom in or out to better see all components being edited.
 -
 View keyboard shortcuts for the diagram controls.
Edit a diagram
You can edit a threat model diagram after creating it. The canvas offers various controls to manipulate both the diagram and the canvas itself.
To edit a diagram on the Diagram canvas, follow the steps below.
Prerequisites:
-
The user has the permission Project role→Project Management→Edit project survey.
Steps:
-
From your SD Elements project, navigate to the Diagram tab.
-
Make your desired changes.
-
Click Save.
The diagram is immediately updated with your changes.
Add a component
After generating a diagram with system components selected in the Survey, you can add more components to the canvas based on the needs of your threat modeling process. See the full list of built-in components here.
As of the 2023.4 release, we have a beta with Threats, Weaknesses, and Countermeasures being generated from the diagram canvas.
| This functionality must be turned on by API with the Decision Engine feature flag, as a user with the ability to turn on feature flags. |
To add a component on the Diagram canvas, follow the steps below.
Steps
-
Click the components icon
. -
Select a component from the list or search for one.
-
Click on the canvas to drop the component onto it.
Right-click the component to see more options: Connect, Group, Label, and Delete.
| If you need a component that is not in the provided list, you can create your own custom component. |
Add a trust zone
Trust zones represent a specified area of a threat model diagram within which all components and connectors have the same level of trust. Logically, there is a common security level within a threat modeling trust zone. One software component inside a trust zone considers other elements within the same zone to have its own level of integrity and confidentiality.
To add a trust zone on the Diagram canvas, follow the steps below.
Steps
-
Click the zone icon
-
Click on the canvas to drop the zone onto it.
-
Drag and drop components into the zone.
-
Resize the zone by dragging components to their desired locations within the borders of the zone.
Right-click the zone to see more options: Connect, Label, Border, Color, and Delete.
Nested trust zones
Trust zones within a threat model diagram can have the same level of trust, implying that components within those trust zones also share the same level of trust. SD Elements supports the nesting of trust zones as a way to illustrate a common level of integrity and confidentiality.
Support for nested zones allows organizations to consistently ensure threat model diagrams generated using SD Elements accurately display the software architecture.
| Zones and connections do not have an impact on Threats, Weaknesses, or Countermeasures. |
You can add a zone to another zone by right-clicking into the context menu or by way of a keyboard shortcut (Ctrl+g for Windows or Cmd+g for macOS). You can also ungroup nested zones with these same methods.
| At this time, you can’t resize zones. |
Add a connector
Connectors illustrate how data moves through a system.
To add a connector on the Diagram canvas, follow the steps below.
Steps
-
Click the connector icon
. -
With the connector control selected, click on a component and drag your cursor to another component until the dashed line shows a solid line from one component to the other.
-
Release the button to create a connection between the two components.

Right-click the connector to see more options: Style, Label, Flip, and Delete.
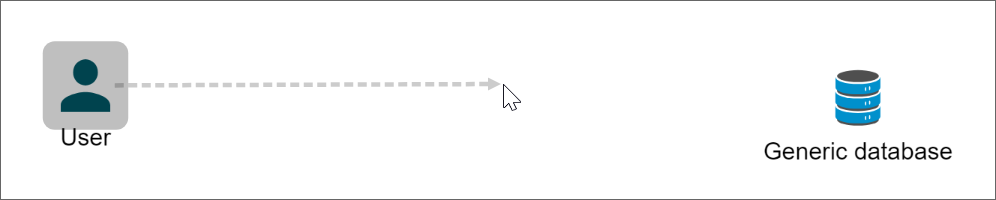
Add a text box
Text boxes provide a way to add notes to a diagram for purposes of sharing context with the diagram audience. This way, collaborative information is preserved when no one is available to walk the audience through a diagram.
| You can also use a text box as a stand-in for missing diagram components. |
You can add a text box to a diagram through the toolbar pallette or by pressing t on your keyboard as a shortcut.
| You can only delete a text box by pressing ESC on your keyboard, clicking the Undo action on the toolbar pallette, or using the Undo keybinding ctrl + Z. |
Share a diagram
To share a diagram with others, follow the steps below.
Prerequisites:
-
The user has the permission Project role→Project Management→Edit project survey.
Steps:
-
Export the diagram as a JSON or PNG file.
-
Share the diagram through secure communication channel, such as a secure file server.
Lock and unlock a diagram
Locking and unlocking a diagram involves locking or unlocking the associated Project Survey. By extension, locking or unlocking a Survey locks or unlocks its corresponding diagram.
Diagrams and new project releases
Your diagram is carried over with subsequent releases of your project in SD Elements. As your codebase evolves, so will your Project Survey, and along with it, your threat modeling diagram. See Create a release project for more information.
Disable diagrams
By default, the diagrams feature is enabled. You can disable the diagram feature in SD Elements by completing the following steps. In 2023.4, a beta feature for diagrams provides the ability to generate Threats, Weaknesses, and Countermeasures from a saved diagram.
| This functionality must be turned on by API with the Decision Engine feature flag, as a user with the ability to turn on feature flags. |
Prerequisites:
-
The user has the permission Organization → Manage features.
Steps:
-
Navigate to the System (gear icon) tab.
-
Select Features.
-
Uncheck the Diagram checkbox.
-
Click Save.
Diagrams are now disabled and are no longer a part of the Project Survey workflow.
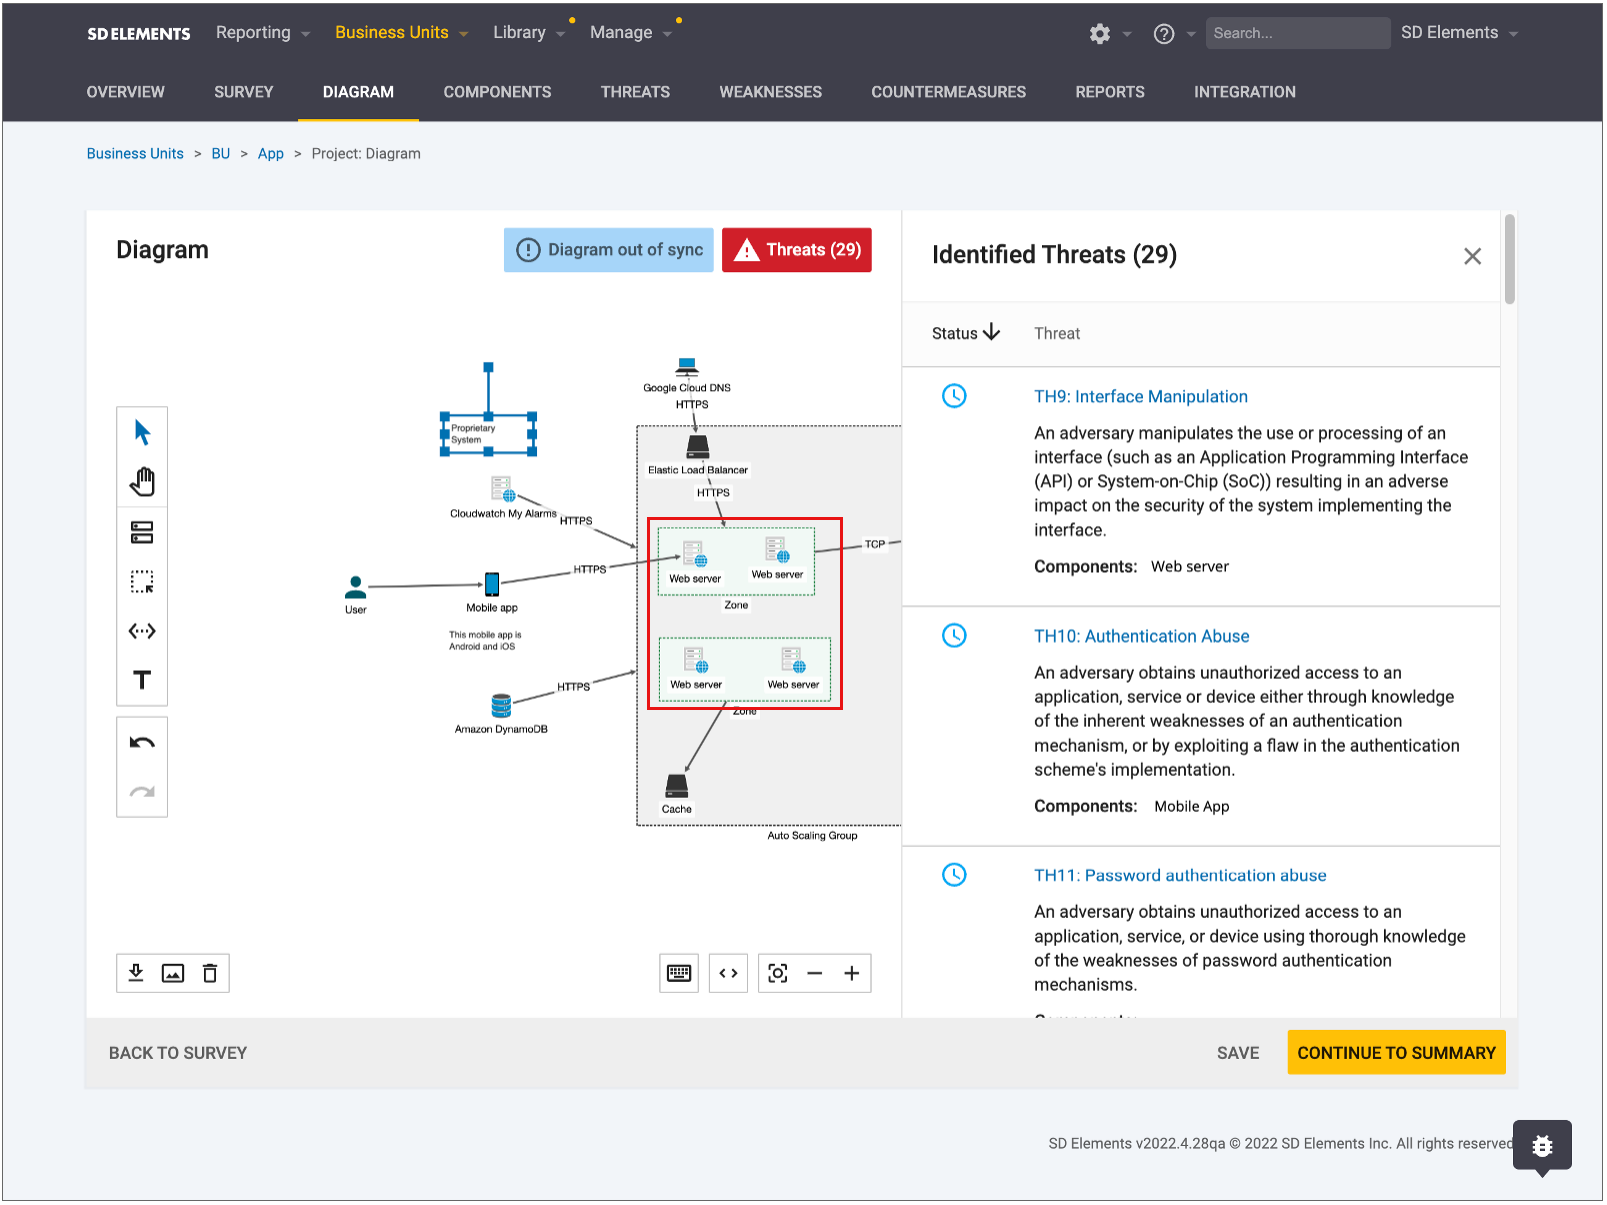
Threats
You can surface threats in the threat model diagram and what weaknesses and countermeasures they’re made up of, in the UI or the API. Threats are comprised of weaknesses and are solved by countermeasures.
Threats help you understand the 'Why' behind countermeasures that are being worked on in an effort to better inform and prioritize security requirements. Threats also ensure that security teams are prioritizing the right work to have a positive impact on their security posture. Threats are visible on the right hand side of the threat model diagram.
Threats Feature Flag Threats can be hidden on the diagram canvas and at the project level for customers who customize the majority of their content. This allows you to prevent having empty threats pages in the project surfaced to customers.
Threats, Weaknesses, and Countermeasures
Threats have a many-to-many relationship to Weaknesses, with multiple Weaknesses able to make up a threat.
-
Countermeasures are tied to Weaknesses, and each Weakness is tied to a Threat.
-
Countermeasures are tied to Weaknesses and each Weaknesses is solved by a Countermeasure.
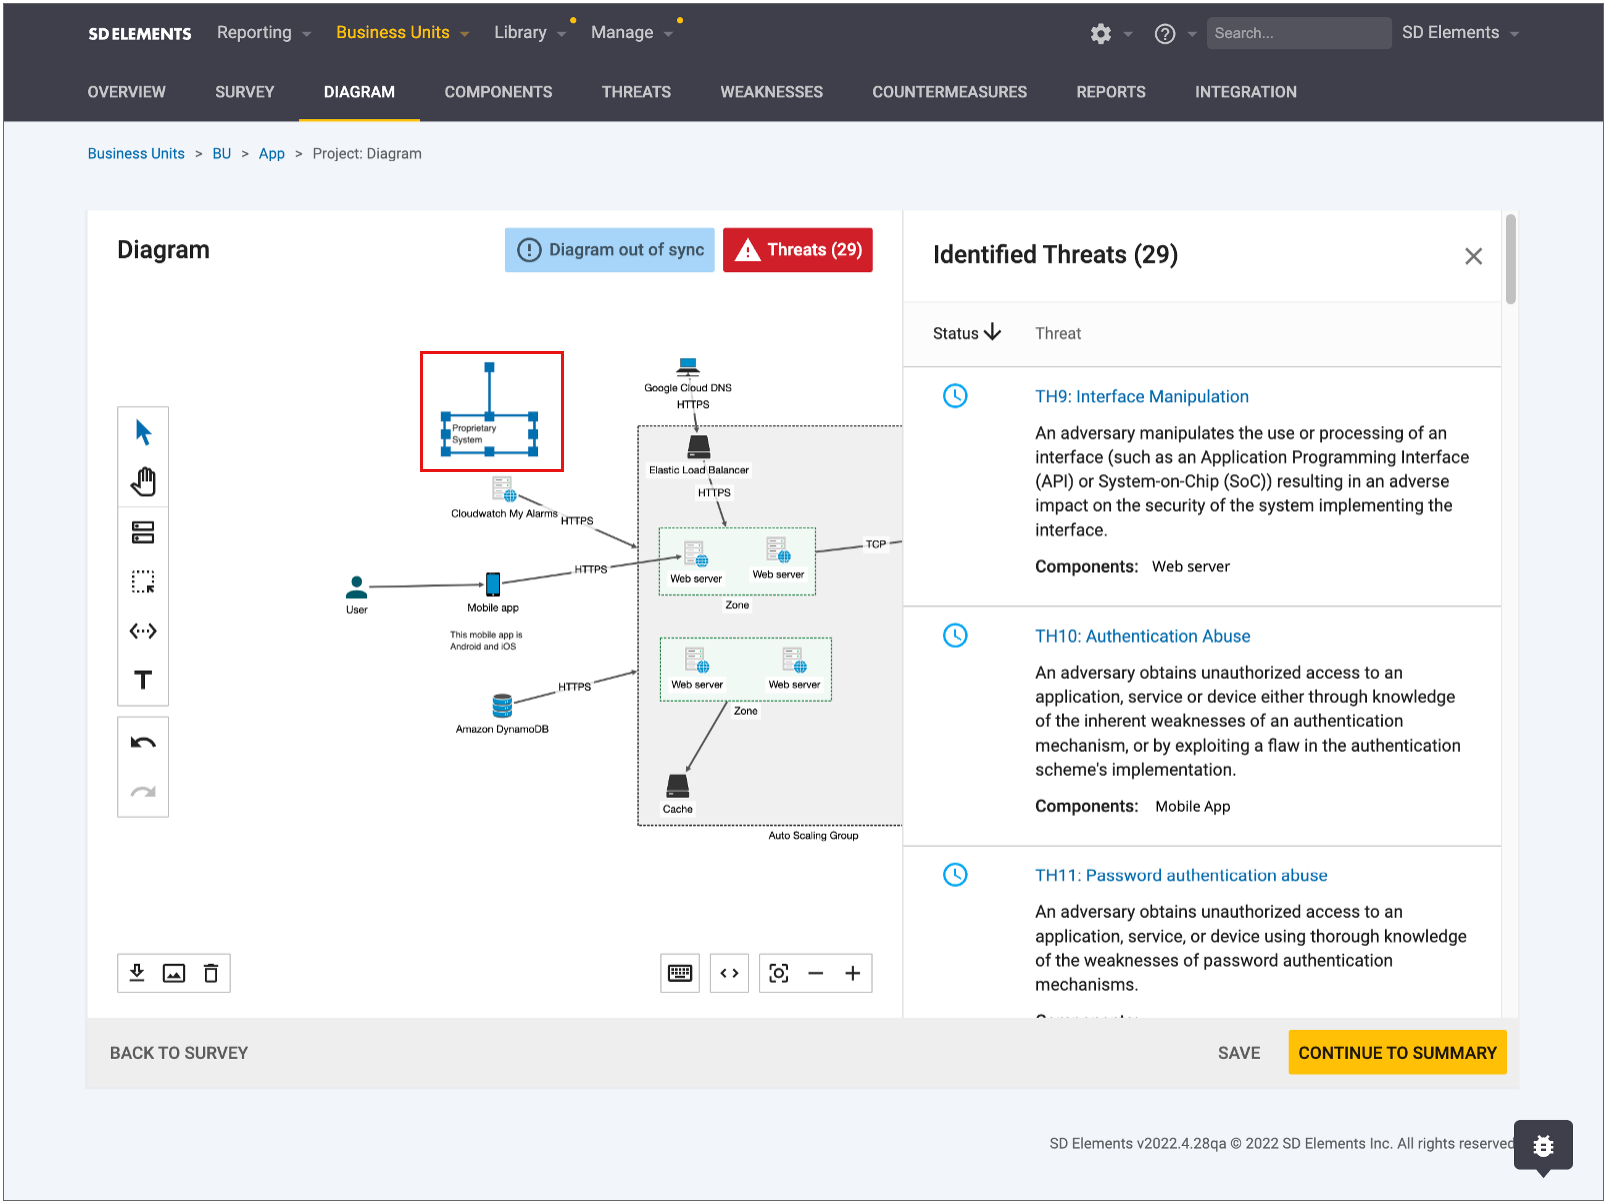
How are threats applied to a project?
Threats are applied to a project when you have saved the diagram canvas. Threats associated with the components used on the diagram canvas will be present in the Threats button or Threats list page. If you have saved the survey, before navigating to the diagram, the threats button will display threats coming from the survey answers. Specifically, threats whose match conditions align with those of the the survey answers you have selected.
-
If you have the 2023.4 beta turned on, threats can be generated from components dragged onto the diagram canvas.
-
Specifically, threats are brought in by Countermeasures and their associated Weaknesses.
Where does Threat status come from?
Threat status comes from the Countermeasure status:
-
If all Countermeasures are done, the threat is mitigated.
-
All Countermeasures must be complete or N/A to be mitigated.
-
-
If all Countermeasures are Not Applicable, the threat is not applicable.
-
All Countermeasures must be N/A for the threat to be not applicable.
-
-
If all Countermeasures are in To Do, the threat is unmitigated.
-
Countermeasures can be in a mix of To Do and N/A for the threat to be unmitigated.
-
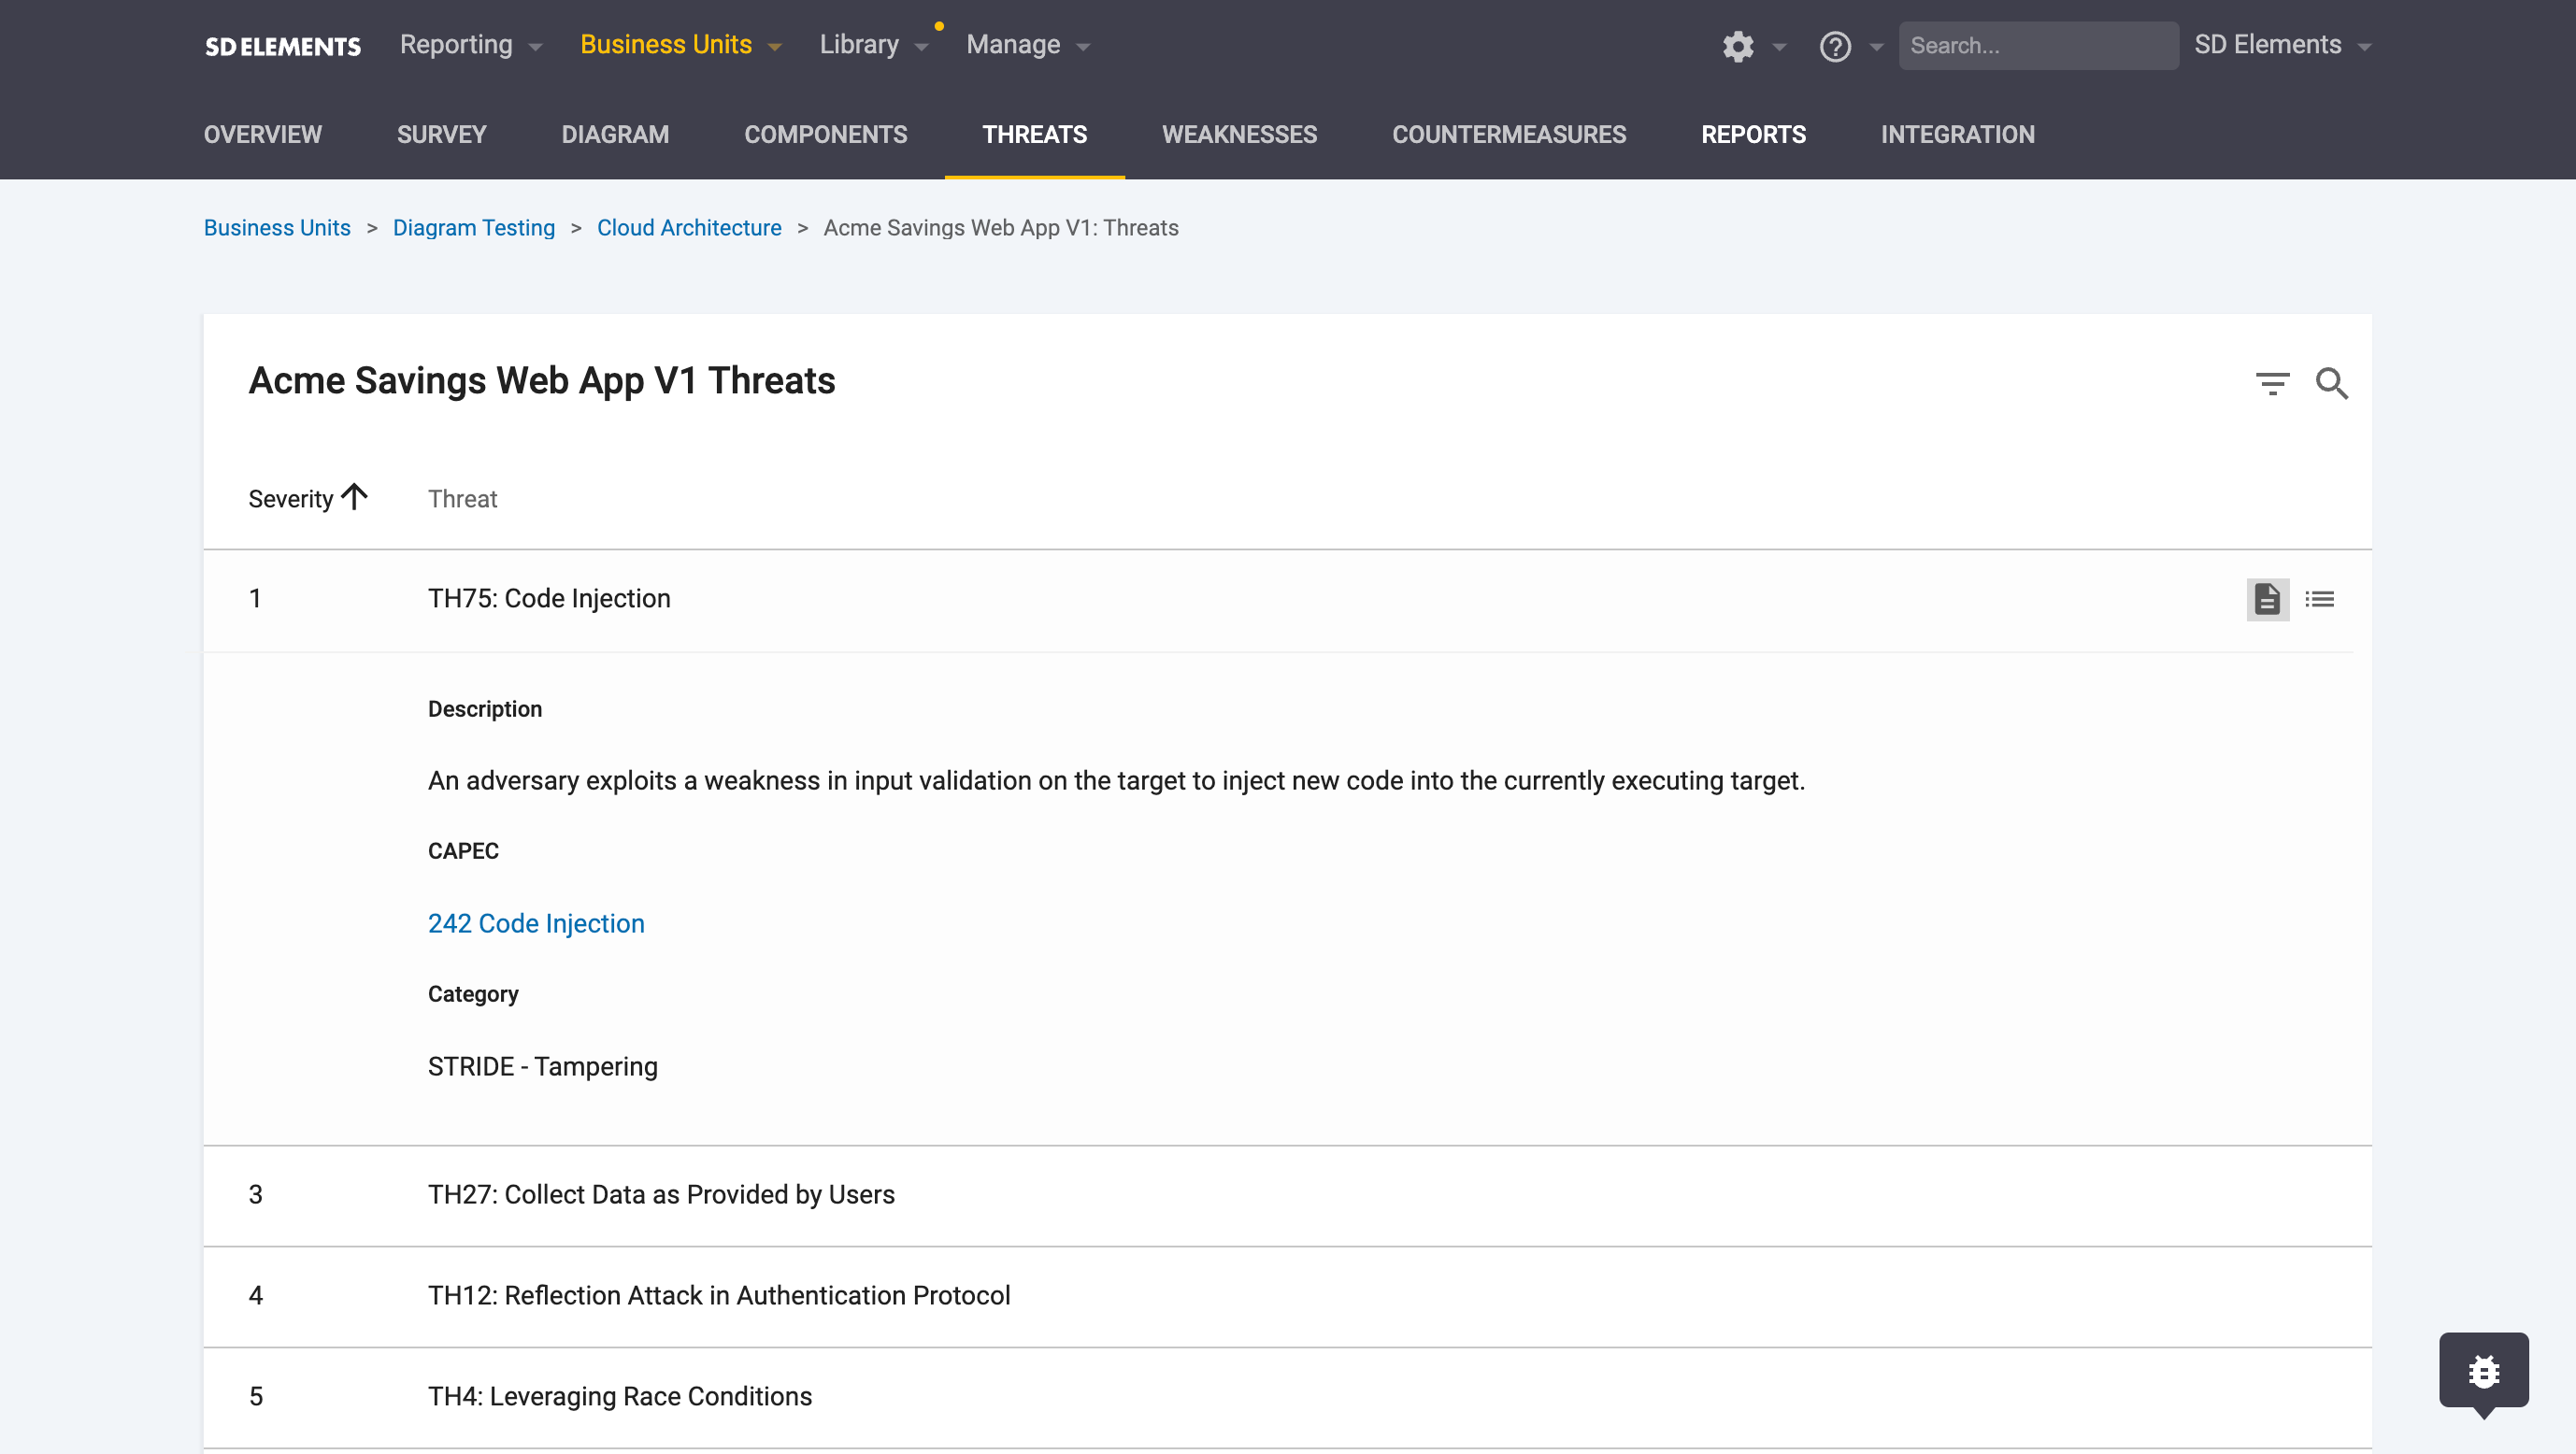
Threats List Page
The threats list page is where you have the ability to do the following:
-
Search for threats based on the title or threat ID
-
Filter for threats based on:
-
CAPEC ID: Where applicable, threats are mapped to CAPEC attack patterns.
-
STRIDE methodology: Where applicable, threats are mapped to a STRIDE category.
-
-
Component: Where applicable, threats are tied to their relevant components.
-
Severity: Countermeasure severity level.
-
-
Identify the related Countermeasures and Weaknesses for that specific threat:
-
Assign users to the countermeasure
-
Mark the status of associated countermeasures
-
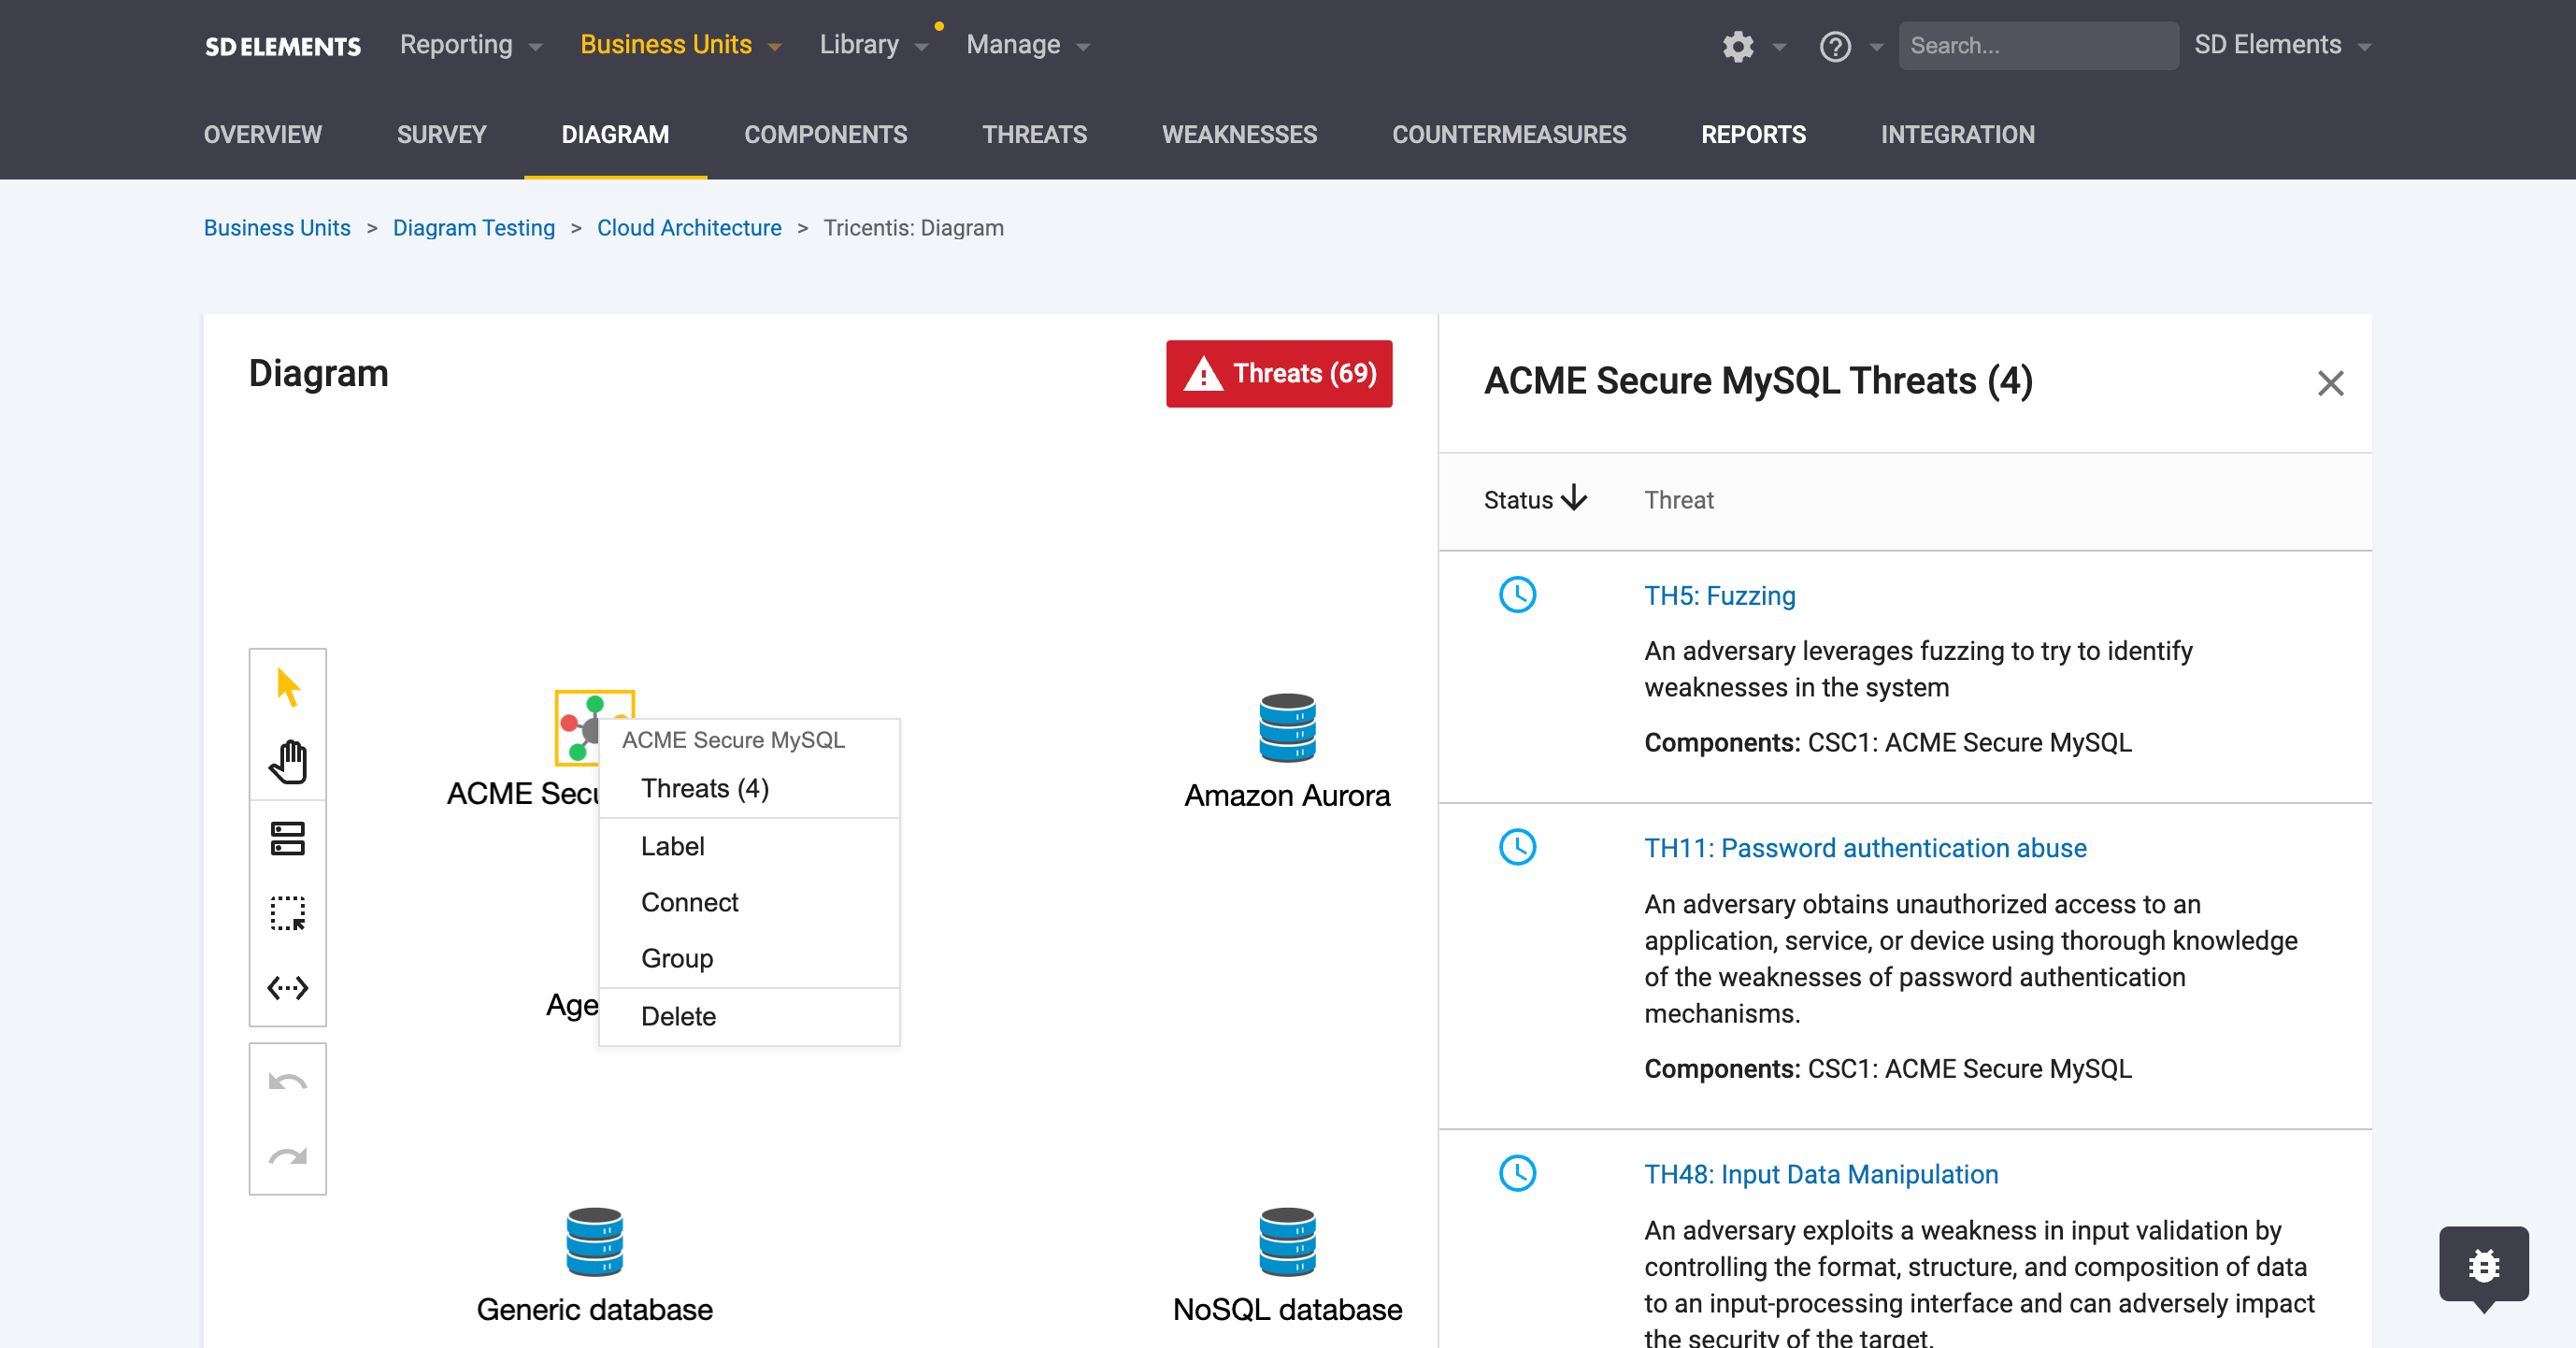
Access the threats list
The threats list is accessible in two ways:
-
From the Threats tab in the project view:
-
From the side panel of the threat model diagram:
-
From the context menu by right-clicking a component:
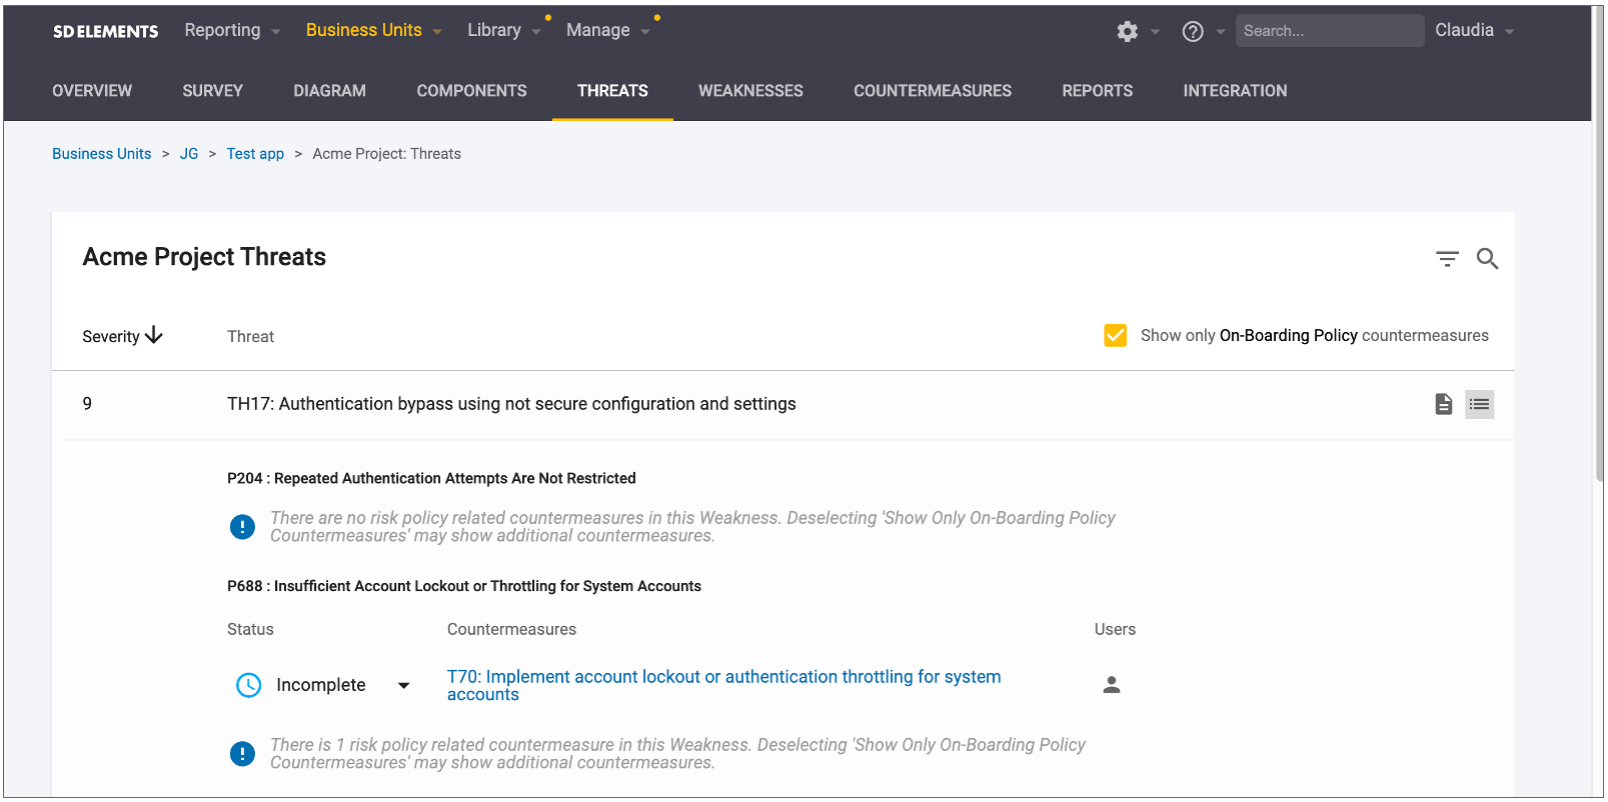
Risk policy on the Threats list page
You can apply a risk policy to filter threats based on the severity of the Countermeasures. This matches the risk policy on the Weaknesses and Countermeasures pages that can also be used to filter based on Countermeasure severity.
When syncing Countermeasures to your issue tracker, you can have only the Countermeasures that are related to your risk policy synced, which will match what is on your threats list page. If filtering based on your chosen risk policy causes the Weakness associated with the threat to have no associated Countermeasures, SD Elements will display a message to make you aware that there are Weaknesses and Countermeasures associated with that particular threat which have been filtered out by the risk policy.