Phases
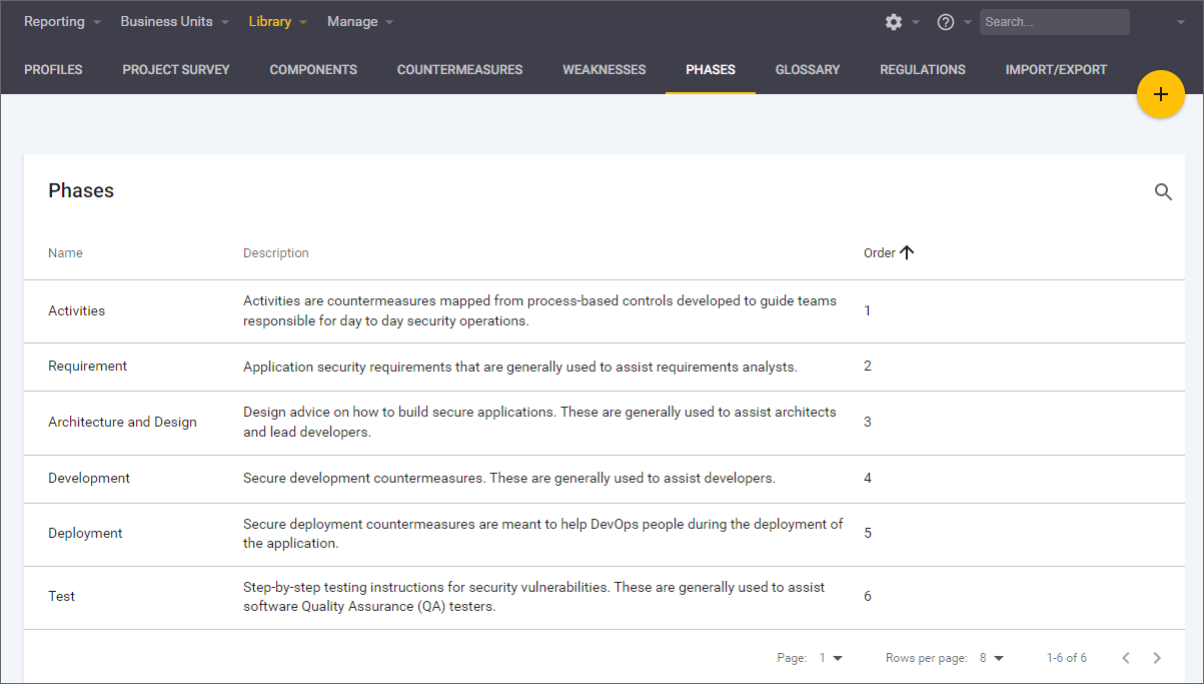
Phases are the stages corresponding to a project’s work effort. By default, SD Elements associates its Countermeasures with five phases: Requirements, Architecture & Design, Development, Testing, and Deployment.
Phases are represented in projects as tabs. Users can navigate to each phase by clicking on the appropriate tab. Organizations that require additional phases can add their own.

Default phases
SD Elements includes the following default phases:
-
Activities: Countermeasures that are a set of activities for securing the SDLC regardless of technologies, frameworks, or languages used for development. These activities may include working with various roles in a team to create necessary procedures proportionate to the team’s maturity, or requiring the team to perform these procedures at different stages of the software development lifecycle based on the project’s associated risk level. These Countermeasures can be enabled or disabled using the Content Pack Selector.
-
Requirements: One-time Countermeasures that can be verified using a verification technique. Think of these as security features of the software. Requirements contrast with development Countermeasures, which occur throughout the code. Requirements Countermeasures tend to correlate to user stories in agile development, while development Countermeasures tend to be constraints on other user stories. For example, "T5: Minimum password standards" is in the requirements phase because it is a one-time Countermeasure that can be tested in a straight-forward manner using run-time testing.
-
Architecture & Design: Security concepts to keep in mind during application design / architecture. Whereas requirements and development Countermeasures are concrete and actionable, design Countermeasures cannot easily be assigned a clear acceptance criteria. For example, "T14: Principles of least privilege" is a design Countermeasure because it is a security principle, but there is no clear way to verify if it has been completed.
-
Development: Security Countermeasures to build during coding. These Countermeasures affect multiple parts of the code. For example, "T31: Perform input validation on all forms of input" affects all code with user input. Development Countermeasures may also include a How-To section with a code sample for the developer to follow.
-
Deployment: These Countermeasures are meant to help DevOps teams during the operations and deployment of the application. Deployment Countermeasures are performed after the software is developed and relate to activities such as platform installation, server configuration, deployment, maintenance, and user management.
-
Testing: Countermeasures to verify that Countermeasures from the other phases have been completed. These Countermeasures are designed for Quality Assurance (QA) teams, security teams, or developers who want to write unit/regression tests. Testing Countermeasures may also include a How-To section that describes how to actually perform the test plan with testing tools, or by using the end user interface manually (such as with a web browser for a web application).
Phase details
A phase has the following fields:
-
Name: The name of the phase.
-
Order: A numeric value indicating the position of the phase amongst the other phases.
-
Description: A description of the phase.
-
Tooltip: Additional information about the phase.
-
Release Behavior: An indication whether the statuses and notes of Countermeasures in a project are carried over to new releases by default. This option can be deselected by users. Details are copied at the time of the release only.
Add a phase
To add a custom phase follow the steps below.
-
The user has the permission Global Roles→Customization→Customize content.
-
Open the Library→Phases page. Click the plus button on the right.
-
Fill in the required fields.
-
Click Create.
The phase is added to the system and present in all projects. Countermeasures can be associated to this new phase.
Edit a phase
To edit a default or custom phase follow the steps below.
-
The user has the permission Global Roles→Customization→Customize content.
-
Open the Library→Phases page.
-
Search for the phase using the interface.
-
Hover over the phase’s row and click the Edit phase pencil icon.
-
Update the fields.
-
Click Done.
The change takes effect immediately and the phase is updated in all projects.
Delete a phase
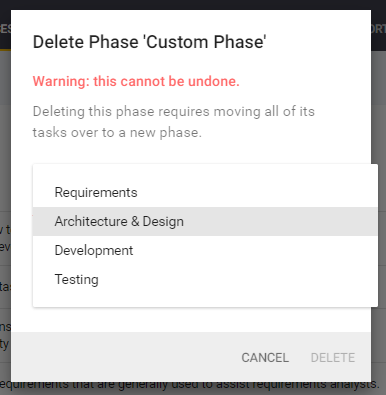
Delete a phase by first moving all assigned Countermeasures to an existing phase. Follow the steps below to delete a phase.
-
The user has permission Global Roles→Customization→Customize content.
-
Open the Library→Phases page.
-
Search for the phase using the interface.
-
Hover over the phase’s row and click the Delete Phase trash can icon.
-
Select an existing phase to move any affected Countermeasures.

-
Click Delete.
The selected phase is removed from the system. Any of its associated Countermeasures are assigned to the selected phase.
