Import/Export
Table of Contents
The Import/Export feature allows users to export SD Elements Library content in various formats, modify it externally, and import it back into the system. This feature is commonly used for bulk updates to Library content. A full library export is also available as an export-only ZIP file.
For information about the kinds of files you can export and their structure, refer to the Library Import & Export File Template documentation.
|
File Formats
Supported formats for Import/Export:
-
xlsx — Recommended for Microsoft Excel. (Be aware that Excel may automatically truncate large files.)
-
csv — Comma-separated values.
-
json — JavaScript Object Notation.
-
yaml — Yet Another Markup Language.
Full library export-only format:
-
ZIP — Compressed archive.
Use a content template as the basis for importing data. Follow the steps below to retrieve a template.
Prerequisites
-
The user must have the permission: Global role → Customization → Customize content.
Steps
-
Click Library → Import/Export.
-
Select the Export tab.
-
Under Templates, choose the Empty option.
-
Select a File Type.
-
Choose a specific Library model (e.g., Countermeasures) or export the entire library.
-
Click Export.
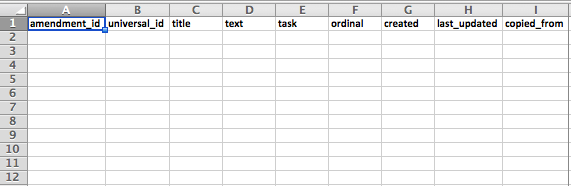
The template defines the required headers, as shown below:
Export All Content
Export the full SD Elements content library for offline review, backup, or bulk editing/reimporting.
Prerequisites
-
The user must have the permission: Global role → Customization → Customize content.
Steps
-
Click Library → Import/Export.
-
Select the Export tab.
-
Under Templates, select All Data.
-
Select a File Type.
-
Choose Export all content types.
-
Click Export.
Export Specific Content
Export content for one of the following types: Weaknesses, Countermeasures, Additional Requirements, How-To’s, Threats or Project Survey.
Prerequisites
-
The user must have the permission: Global role → Customization → Customize content.
Steps
-
Navigate to one of the following:
-
Library → Weaknesses
-
Library → Countermeasures (includes Additional Requirements and How-To’s)
-
Library → Threats
-
Library → Import/Export (supports sepcific content exports)
-
-
Select the Export tab.
-
Under Templates, select All Data.
-
Select a File Type.
-
Click Export.
Export a Specific Content Template
Use a content template as a basis for importing specific Library content types. Supported templates include: Weaknesses, Countermeasures, Additional Requirements, How-To’s, Threats or Project Survey.
Prerequisites
-
The user must have the permission: Global role → Customization → Customize content.
Steps
-
Navigate to one of the following:
-
Library → Weaknesses
-
Library → Countermeasures (Countermeasures, Additional Requirements, How-To’s)
-
Library → Threats
-
Library → Import/Export (supports sepcific content exports)
-
-
Select the Export tab.
-
Under Templates, select All Data.
-
Select a File Type.
-
Click Export.
Import Content
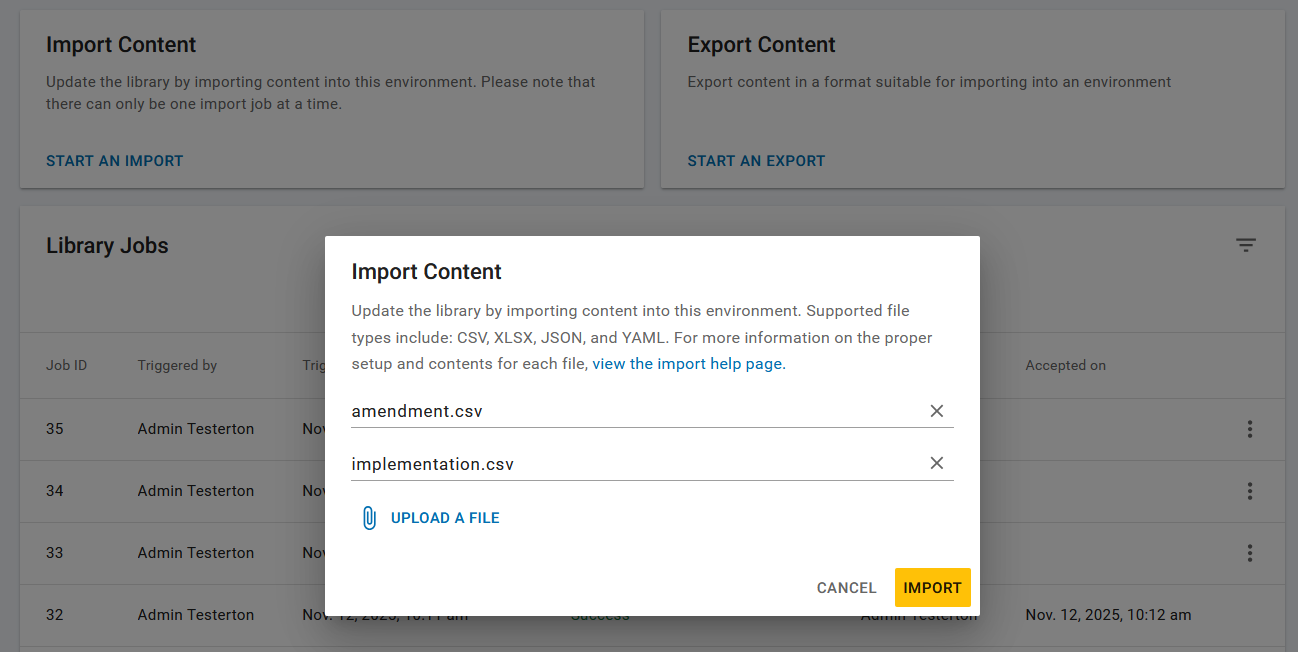
Use the import function to submit bulk changes to the Library. Up to five files can be uploaded in a single import job.
Prerequisites
-
The user must have the permission: Global role → Customization → Customize content.
Steps
-
Click Library → Import/Export.
-
Select the Import tab.
-
Click Choose File and select your file. To upload multiple files (max 5), click Upload File for each.
-
Click Import.
-
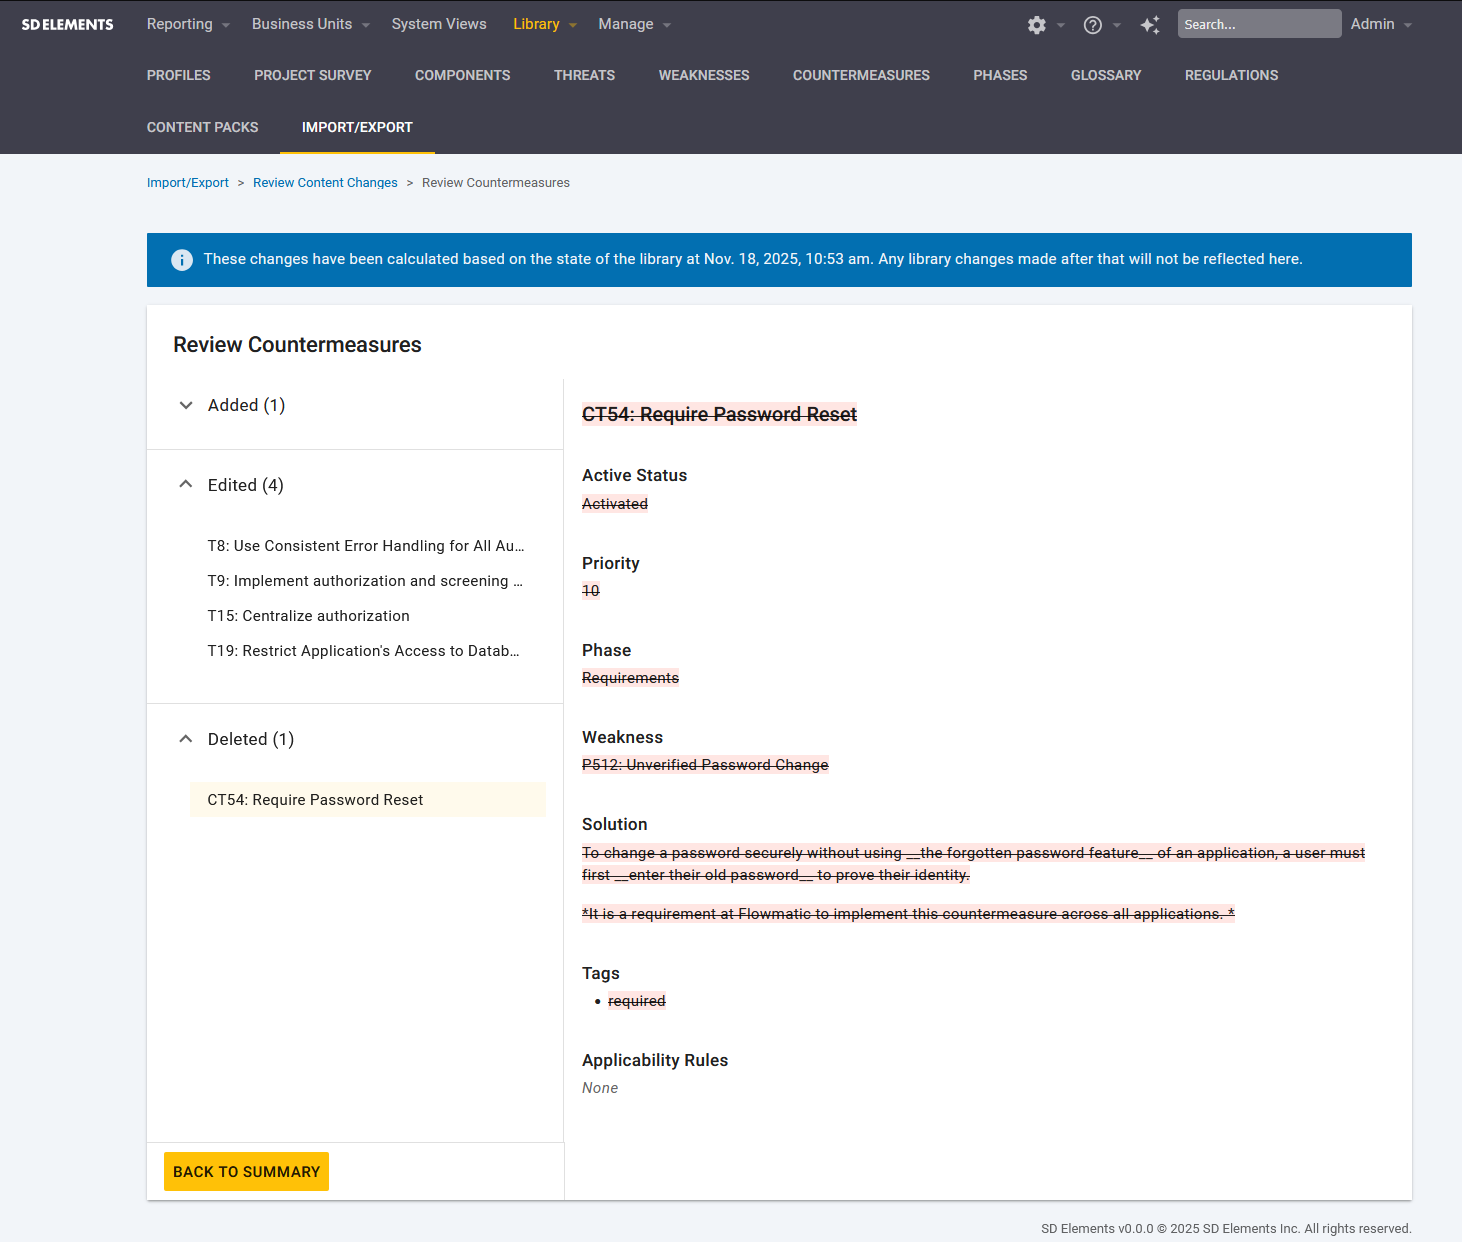
The system analyzes the files and generates a diff view.
-
Review detected changes:
-
New content appears in green
-
Updated/replaced content appears in red
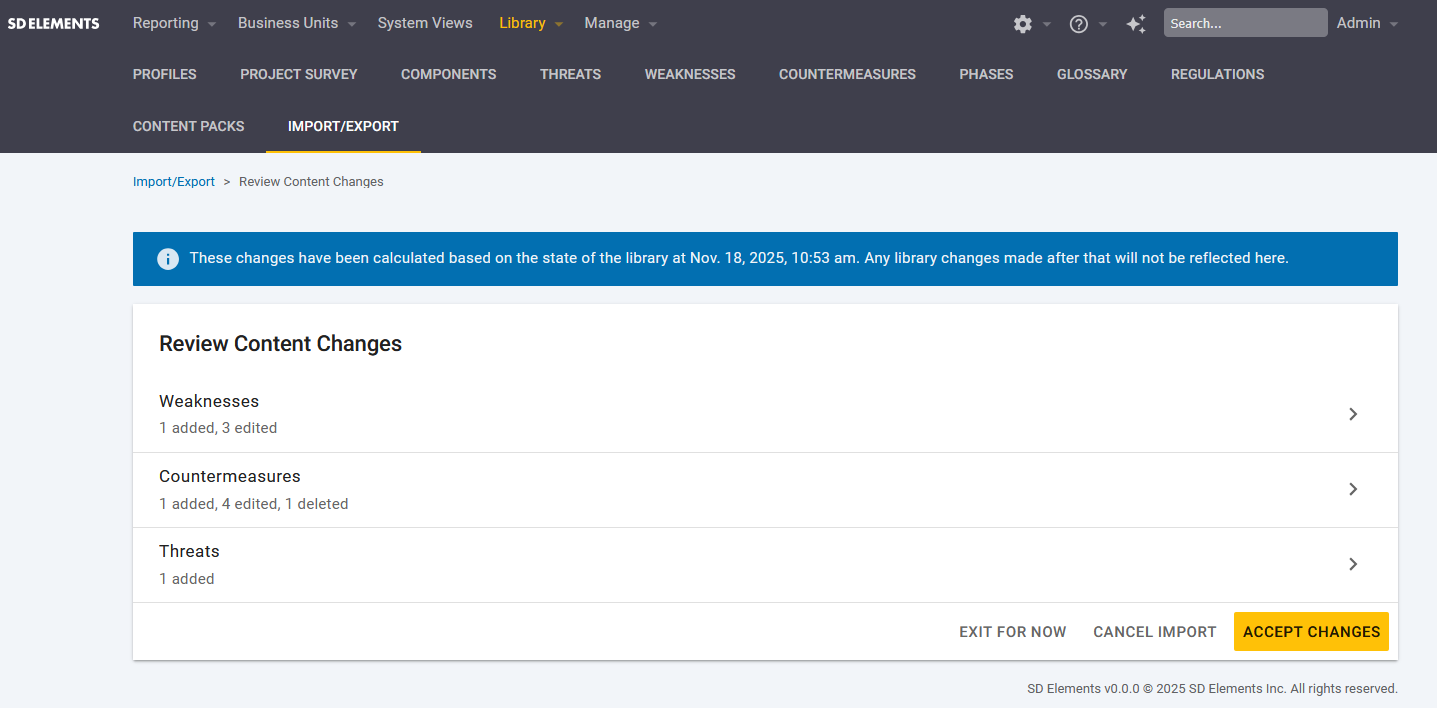
A summary page will list all additions, edits, and deletions.
-
-
When ready, click Accept Changes to process the job asynchronously.
-
Apply changes by clicking Accept. Click Cancel to abandon the import.
|
Review changes carefully. Import actions cannot be undone. |
Troubleshooting
If an unsupported file format or invalid content is detected, an error message appears.
Example:
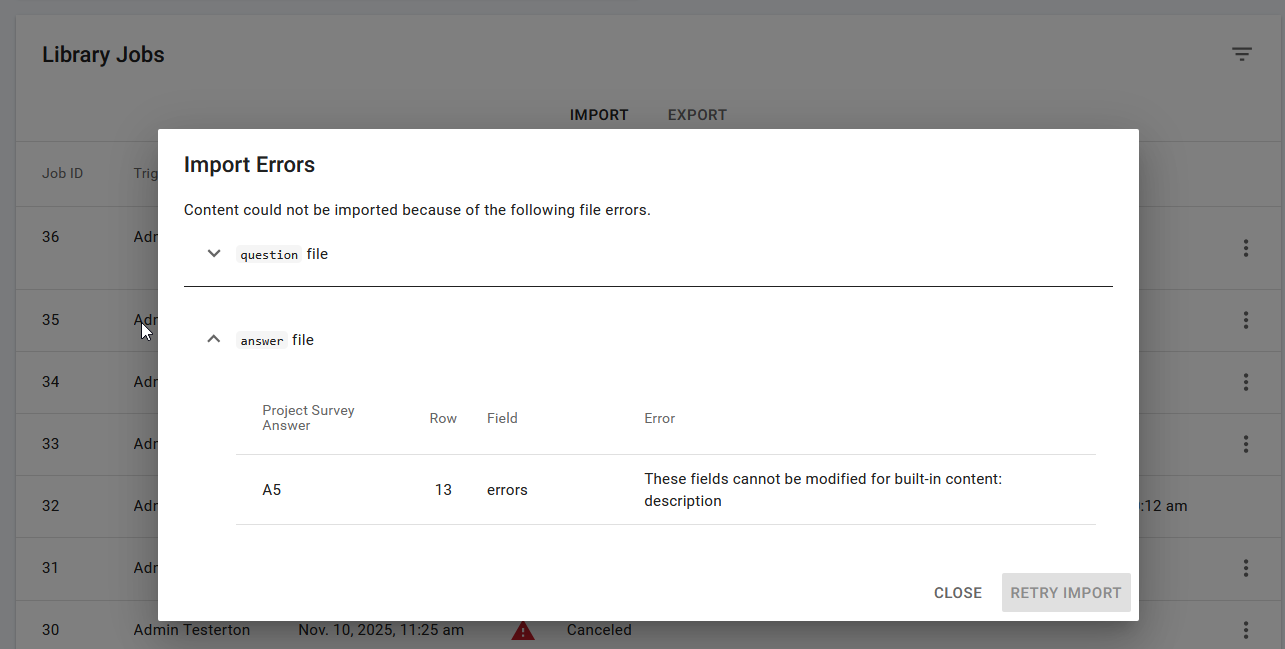
Solution
-
Correct the content in your import file.
-
Click Close.
-
Restart the import process using the updated file.